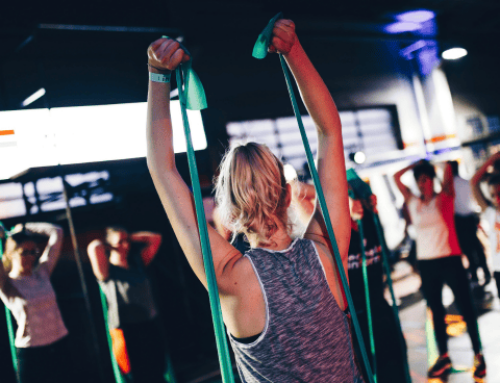
Building Strong and Mobile Shoulders, Part 2: The Workout

In Part 1 of this series, we highlighted a simple self-test that sets a baseline for your shoulder health and mobility. This important test alerts you to any potential shoulder issues and suggests possible causes of movement restrictions. If the test gave you fits, read on to learn simple workout tweaks that can restore mobility to one of the most important areas of your body.
Shoulder Mobility
Several moving parts in the shoulder contribute to proper mobility. Making sure each part fits well with the others is imperative, since a defect in one area could produce more problems along the chain.
To improve shoulder mobility, you must first improve tissue quality in the major muscle groups of the upper body. Issues can be caused by hunching over your phone as you text, sitting slouched as you watch TV or overtraining the mirror muscles (guy in the cut-off sleeves, I’m talking to you!), resulting in “Upper-Crossed Syndrome.”1 Basically, a muscular imbalance created by overly tight and short muscles in the chest and upper back prevent the neck stabilizers and mid-back muscles from properly balancing the aggressive pull from the front. The result is a rolled posture, with the shoulders hunched forward.
Creating Strong, Mobile Shoulders
Myofascial release techniques, like foam rolling and massage, can reduce tightness and ease super stiff muscles in the chest and upper back. Once you’ve “kneaded the dough,” you can stretch these muscles back to their original length. Read the myofascial release and stretching workout section below for specific methods.
The next step does not involve the shoulder, at least not directly. We are taking a detour to the thoracic spine, where the ribs attach. While other parts of the spine can move, the thoracic spine is designed to move. Many athletic skills, including throwing a ball and swinging a club, place a large demand on thoracic rotation, so it is crucial to have adequate mobility in this area. And since the thoracic spine serves as an anchor for the shoulder blades, a restriction in this area not only limits shoulder mobility but may also negatively affect shoulder stability. See the thoracic spine section below to learn how to develop proper extension and rotation in your thoracic region.
The final component of your shoulder mobility workout involves strengthening the muscles around the joint. When you improve mobility in a previously limited joint, you must strengthen the surrounding muscles to facilitate your newly-acquired range of motion. Greater mobility is only beneficial if it can be properly managed and controlled. Strengthening the motion seals it into the central nervous system, making the improvement permanent. Look at the integrated strength pattern section below to bring it all together and to make sure your shoulder mobility is working on all cylinders.
Mobility and Stretching
1) Foam Roll Peanut
- Stand against wall or lie flat on back with arms at sides
- Tape two tennis balls together; place at top of shoulder blades, about an inch and half below base of neck
- Reach arms overhead and touch thumbs to wall or floor; stop motion and reverse if low back curves off wall or ground
- Return arms to sides, repeat for specified reps
- Progress to alternating arm raises
Sets/Reps: 1-2×10

2) Foam Roll Pecs
- Lie with chest on ground and place foam roller under one side of chest
- Roll slowly for specified time over pec, focusing on trigger points
Sets/Reps: 1×30-60 seconds each side

3) Shoulder Blade Flossing
- Begin with one fist behind curve of neck, holding end of belt or resistance band
- Reach opposite hand behind low back and grab belt or band
- Gently pull down with bottom hand to stretch upper arm; hold position for two seconds
- Gently pull up with top hand to stretch bottom arm; hold position for two seconds
- Repeat for specified reps
- Perform set on opposite side
Sets/Reps: 1×5 each side

4) T-Spine Rotations
- Start on all fours with knees wide and feet together
- Sit hips back onto heels
- Place left hand behind head, open chest and reach left elbow toward ceiling; use right arm for balance and keep low back flat
- Repeat for specified reps
Sets/Reps: 2×8 each side

5) Wall Slides
- Stand with head, back and butt flat against wall and feet together
- Hold arms to sides with backs of hands and elbows against wall and tucked to sides
- Reach overhead, keeping backs of hands and elbows against wall; stop movement and slide back down if hands, elbows or low back come off wall
- Lower to start position; repeat for specified reps
Sets/Reps: 2×8

Strength Exercises
6) Shoulder Flexion and Extension
- Assume kneeling position, holding light to moderate resistance band with one arm at side and opposite arm overhead
- Squeeze shoulder blades together and pull top and bottom hand backward as far as possible; look under top arm to stabilize neck
- Repeat for specified reps; perform set on opposite side
Sets/Reps: 3×8 each side

7) TRX Inverted Rows
- Holding TRX straps, lean back at 45-degree angle with slight bend in knees and hips held high
- Squeeze shoulder blades together and pull arms back to perform row; maintain straight body alignment
- Slowly extend arms; repeat for specified reps
Sets/Reps: 3×8

Source: 1) Phillip Page, Clare Frank, Robert Lardner. Assessment and Treatment of Muscle Imbalance: The Janda Approach. Human Kinetics, 2009.
RECOMMENDED FOR YOU


MOST POPULAR


Building Strong and Mobile Shoulders, Part 2: The Workout
In Part 1 of this series, we highlighted a simple self-test that sets a baseline for your shoulder health and mobility. This important test alerts you to any potential shoulder issues and suggests possible causes of movement restrictions. If the test gave you fits, read on to learn simple workout tweaks that can restore mobility to one of the most important areas of your body.
Shoulder Mobility
Several moving parts in the shoulder contribute to proper mobility. Making sure each part fits well with the others is imperative, since a defect in one area could produce more problems along the chain.
To improve shoulder mobility, you must first improve tissue quality in the major muscle groups of the upper body. Issues can be caused by hunching over your phone as you text, sitting slouched as you watch TV or overtraining the mirror muscles (guy in the cut-off sleeves, I’m talking to you!), resulting in “Upper-Crossed Syndrome.”1 Basically, a muscular imbalance created by overly tight and short muscles in the chest and upper back prevent the neck stabilizers and mid-back muscles from properly balancing the aggressive pull from the front. The result is a rolled posture, with the shoulders hunched forward.
Creating Strong, Mobile Shoulders
Myofascial release techniques, like foam rolling and massage, can reduce tightness and ease super stiff muscles in the chest and upper back. Once you’ve “kneaded the dough,” you can stretch these muscles back to their original length. Read the myofascial release and stretching workout section below for specific methods.
The next step does not involve the shoulder, at least not directly. We are taking a detour to the thoracic spine, where the ribs attach. While other parts of the spine can move, the thoracic spine is designed to move. Many athletic skills, including throwing a ball and swinging a club, place a large demand on thoracic rotation, so it is crucial to have adequate mobility in this area. And since the thoracic spine serves as an anchor for the shoulder blades, a restriction in this area not only limits shoulder mobility but may also negatively affect shoulder stability. See the thoracic spine section below to learn how to develop proper extension and rotation in your thoracic region.
The final component of your shoulder mobility workout involves strengthening the muscles around the joint. When you improve mobility in a previously limited joint, you must strengthen the surrounding muscles to facilitate your newly-acquired range of motion. Greater mobility is only beneficial if it can be properly managed and controlled. Strengthening the motion seals it into the central nervous system, making the improvement permanent. Look at the integrated strength pattern section below to bring it all together and to make sure your shoulder mobility is working on all cylinders.
Mobility and Stretching
1) Foam Roll Peanut
- Stand against wall or lie flat on back with arms at sides
- Tape two tennis balls together; place at top of shoulder blades, about an inch and half below base of neck
- Reach arms overhead and touch thumbs to wall or floor; stop motion and reverse if low back curves off wall or ground
- Return arms to sides, repeat for specified reps
- Progress to alternating arm raises
Sets/Reps: 1-2×10
2) Foam Roll Pecs
- Lie with chest on ground and place foam roller under one side of chest
- Roll slowly for specified time over pec, focusing on trigger points
Sets/Reps: 1×30-60 seconds each side
3) Shoulder Blade Flossing
- Begin with one fist behind curve of neck, holding end of belt or resistance band
- Reach opposite hand behind low back and grab belt or band
- Gently pull down with bottom hand to stretch upper arm; hold position for two seconds
- Gently pull up with top hand to stretch bottom arm; hold position for two seconds
- Repeat for specified reps
- Perform set on opposite side
Sets/Reps: 1×5 each side
4) T-Spine Rotations
- Start on all fours with knees wide and feet together
- Sit hips back onto heels
- Place left hand behind head, open chest and reach left elbow toward ceiling; use right arm for balance and keep low back flat
- Repeat for specified reps
Sets/Reps: 2×8 each side
5) Wall Slides
- Stand with head, back and butt flat against wall and feet together
- Hold arms to sides with backs of hands and elbows against wall and tucked to sides
- Reach overhead, keeping backs of hands and elbows against wall; stop movement and slide back down if hands, elbows or low back come off wall
- Lower to start position; repeat for specified reps
Sets/Reps: 2×8
Strength Exercises
6) Shoulder Flexion and Extension
- Assume kneeling position, holding light to moderate resistance band with one arm at side and opposite arm overhead
- Squeeze shoulder blades together and pull top and bottom hand backward as far as possible; look under top arm to stabilize neck
- Repeat for specified reps; perform set on opposite side
Sets/Reps: 3×8 each side
7) TRX Inverted Rows
- Holding TRX straps, lean back at 45-degree angle with slight bend in knees and hips held high
- Squeeze shoulder blades together and pull arms back to perform row; maintain straight body alignment
- Slowly extend arms; repeat for specified reps
Sets/Reps: 3×8
Source: 1) Phillip Page, Clare Frank, Robert Lardner. Assessment and Treatment of Muscle Imbalance: The Janda Approach. Human Kinetics, 2009.