How to Perform the Turkish Get-Up Properly
The Turkish Get Up (TGU) is perhaps one of the most unique movements one can perform due its paradoxically challenging yet simple characteristics. The exact origins of this movement aren’t universally known; however, many speculate that it dates back several decades or even centuries, popularized by wrestlers from what is now known as Turkey.
To the naked eye, it is simply nothing more than getting up from a supine to a standing position while holding a weight over one’s head. Conversely, anybody who has tried it with a significant load can inform you how difficult it truly can be. Most coaches and fitness enthusiasts alike understand the meticulous details required to execute this movement properly with maximal load, hence why it is important to learn properly. The benefits of the TGU are essentially endless, ranging from challenging one’s core and shoulder stability to testing hip and thoracic mobility. Personally, I am a huge fan of the TGU, and have incorporated it into my own program and those who I train on a regular basis. I believe that everybody can and should perform this movement from time to time, with the proper form, of course. Below is a step-by-step breakdown of how to properly perform the TGU.
Step 1: The Set Up
While getting set up to begin this exercise might not seem like an actual “step”, it is where I see the most mistakes occur. If one isn’t set up properly to start, then the only thing they are setting themselves up for is failure.
Begin this exercise in a supine position with one of your arms pointed straight towards the ceiling, hand in line with your shoulder (the one that will be holding the weight), shoulder blade packed down and back, and the same side leg bent so that your foot is flat with the heel close to under your knee. On the opposite side of your body, extend your arm out to an angle of approximately 45 degrees with the palm down. Similarly, keep the leg on this side of your body straight and abduct it out to about 45 degrees directly in line with your arm. You should now be in a good position to start the TGU.
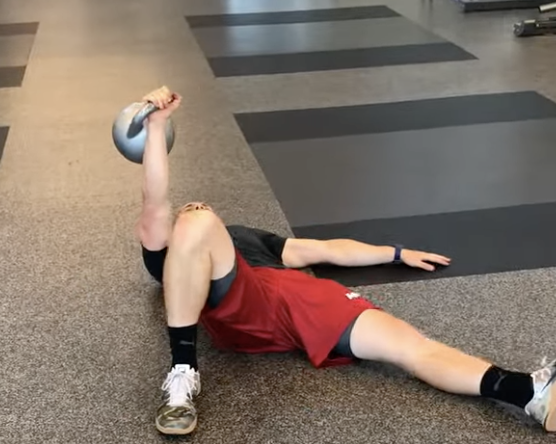
Step 2: Sit Up To The Elbow
The next step is quite small. Begin by fixing your eyes on the weight. Next, drive directly into the ground with both heels and your palm (keeping your near side leg bent still) while sitting up to your elbow. You should keep the weight directly above your shoulder without allowing it to dip and keep your three free limbs glued to the ground. The most common mistake I often see here is individuals lifting their legs/heels off the ground or allowing their bent leg to excessively cave inward, a little bit is ok.
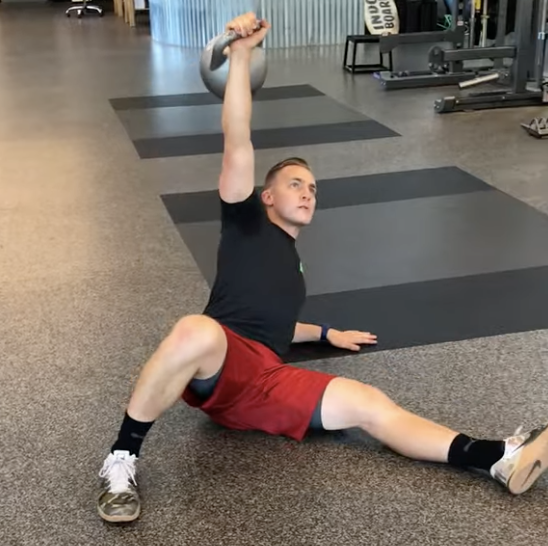
Step 3: Sit Up To The Hand “Squish The Bug”
During this step, you will sit up from your elbow to your hand so that your arm is extended and ready to base for the next step. One of the major cues I use to help with this step is imagining a bug underneath your hand that is on the ground. I want you to squish this bug underneath your hand as you sit up from your elbow to your hand. Your hand should rotate 180 degrees creating some “torque,” so to speak, such that your fingers go from facing in front of you to somewhere behind you. Everything else remains the same, the weight remains over your shoulder, and you now have an upright torso.
Step 4: The Hip Bridge
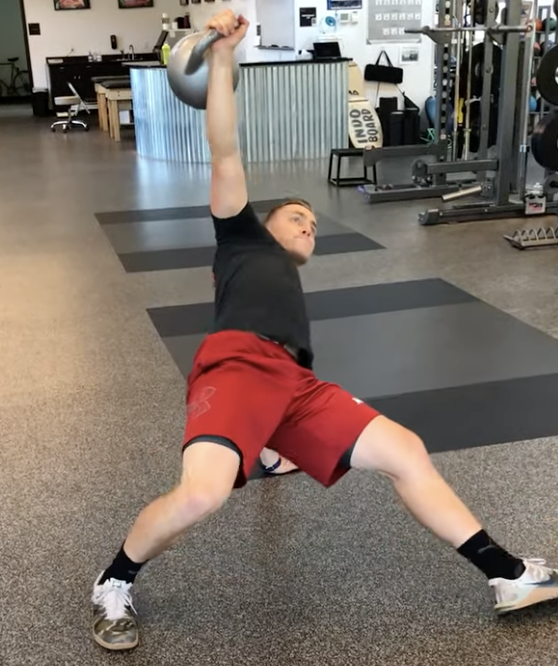
This step is one of the most difficult parts of the movement for many people. This is why I often recommend repping this part of the movement in isolation for extra practice. What you need to do is keep your base arm extended, drive through both heels, and bridge your hips up straight to the ceiling. It is imperative to get your hips as high as possible here, which will become obvious why in the next step.
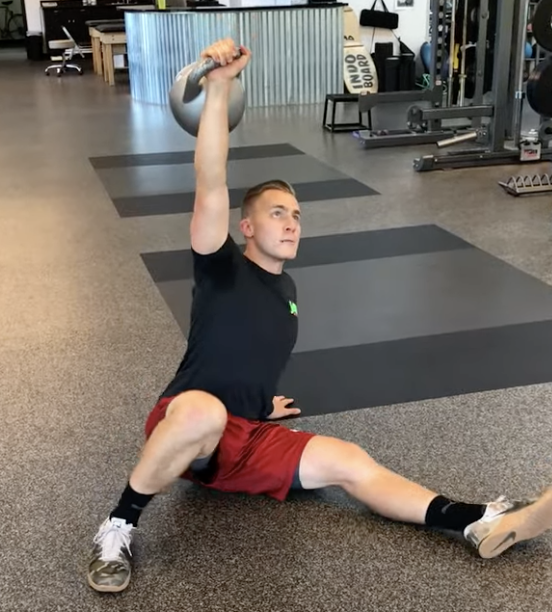
Step 5: Sit Through
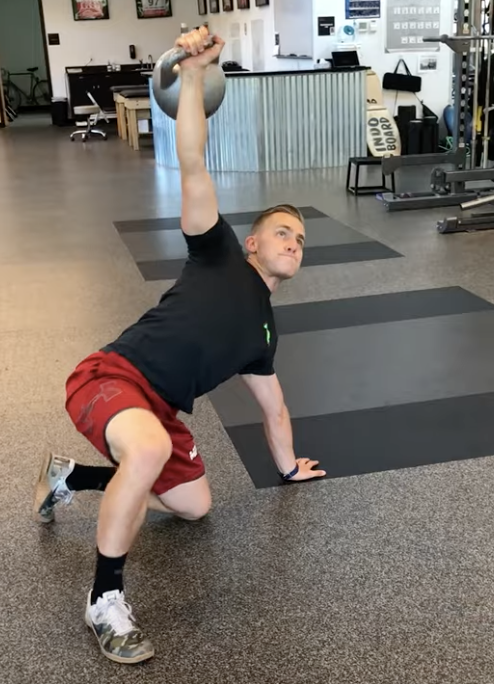
During this step, hip mobility will be greatly challenged. With your hips bridged as high as possible per the last step, you will now bring your straight leg underneath your same side hip. You will have to bend your knee as you are bringing the leg through, and it is critical to place your knee directly underneath your hip. The same side arm should still be on the ground while the weighted arm is remaining steady and straight above your shoulder, as mentioned in previous steps. This position is commonly referred to as a half-kneeling “windmill’ which is very challenging under load.
Step 6: Time to Stand Up
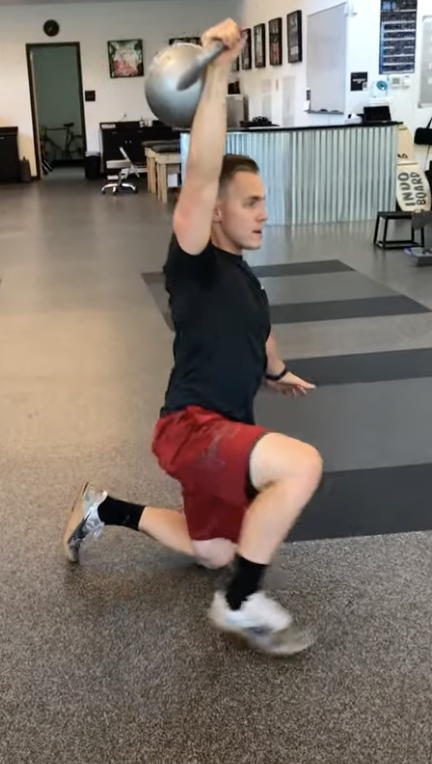
While most people who get to this point can stand up from here, no matter what level of technique they use, it is still imperative to finish the movement properly. You will take your base hand off the ground, bend your torso back to a straight position, and take a small step inward step with your bent leg so that you are in an upright position looking similar to the bottom of a lunge. From here, while keeping the weight straight above you, step your back leg forward and stand up tall. This completes the TGU, which can and should be done in reverse back to the ground to complete one full repetition.
Summary:
While the TGU can quickly become a daunting movement to execute due to its plethora of technical nuances, I believe anybody can perform this movement. I encourage most individuals to start with little to no weight whatsoever while focusing on technique. Once you can perform this movement perfectly with a shoe or foam block on a closed fist without it falling off throughout the entire motion, it is then that you are ready to move on to using a light weight. If there is a particular step that you struggle with on this movement, practice it in isolation for several repetitions until you feel comfortable doing so.
RECOMMENDED FOR YOU


MOST POPULAR


How to Perform the Turkish Get-Up Properly
The Turkish Get Up (TGU) is perhaps one of the most unique movements one can perform due its paradoxically challenging yet simple characteristics. The exact origins of this movement aren’t universally known; however, many speculate that it dates back several decades or even centuries, popularized by wrestlers from what is now known as Turkey.
To the naked eye, it is simply nothing more than getting up from a supine to a standing position while holding a weight over one’s head. Conversely, anybody who has tried it with a significant load can inform you how difficult it truly can be. Most coaches and fitness enthusiasts alike understand the meticulous details required to execute this movement properly with maximal load, hence why it is important to learn properly. The benefits of the TGU are essentially endless, ranging from challenging one’s core and shoulder stability to testing hip and thoracic mobility. Personally, I am a huge fan of the TGU, and have incorporated it into my own program and those who I train on a regular basis. I believe that everybody can and should perform this movement from time to time, with the proper form, of course. Below is a step-by-step breakdown of how to properly perform the TGU.
Step 1: The Set Up
While getting set up to begin this exercise might not seem like an actual “step”, it is where I see the most mistakes occur. If one isn’t set up properly to start, then the only thing they are setting themselves up for is failure.
Begin this exercise in a supine position with one of your arms pointed straight towards the ceiling, hand in line with your shoulder (the one that will be holding the weight), shoulder blade packed down and back, and the same side leg bent so that your foot is flat with the heel close to under your knee. On the opposite side of your body, extend your arm out to an angle of approximately 45 degrees with the palm down. Similarly, keep the leg on this side of your body straight and abduct it out to about 45 degrees directly in line with your arm. You should now be in a good position to start the TGU.
Step 2: Sit Up To The Elbow
The next step is quite small. Begin by fixing your eyes on the weight. Next, drive directly into the ground with both heels and your palm (keeping your near side leg bent still) while sitting up to your elbow. You should keep the weight directly above your shoulder without allowing it to dip and keep your three free limbs glued to the ground. The most common mistake I often see here is individuals lifting their legs/heels off the ground or allowing their bent leg to excessively cave inward, a little bit is ok.
Step 3: Sit Up To The Hand “Squish The Bug”
During this step, you will sit up from your elbow to your hand so that your arm is extended and ready to base for the next step. One of the major cues I use to help with this step is imagining a bug underneath your hand that is on the ground. I want you to squish this bug underneath your hand as you sit up from your elbow to your hand. Your hand should rotate 180 degrees creating some “torque,” so to speak, such that your fingers go from facing in front of you to somewhere behind you. Everything else remains the same, the weight remains over your shoulder, and you now have an upright torso.
Step 4: The Hip Bridge
This step is one of the most difficult parts of the movement for many people. This is why I often recommend repping this part of the movement in isolation for extra practice. What you need to do is keep your base arm extended, drive through both heels, and bridge your hips up straight to the ceiling. It is imperative to get your hips as high as possible here, which will become obvious why in the next step.
Step 5: Sit Through
During this step, hip mobility will be greatly challenged. With your hips bridged as high as possible per the last step, you will now bring your straight leg underneath your same side hip. You will have to bend your knee as you are bringing the leg through, and it is critical to place your knee directly underneath your hip. The same side arm should still be on the ground while the weighted arm is remaining steady and straight above your shoulder, as mentioned in previous steps. This position is commonly referred to as a half-kneeling “windmill’ which is very challenging under load.
Step 6: Time to Stand Up
While most people who get to this point can stand up from here, no matter what level of technique they use, it is still imperative to finish the movement properly. You will take your base hand off the ground, bend your torso back to a straight position, and take a small step inward step with your bent leg so that you are in an upright position looking similar to the bottom of a lunge. From here, while keeping the weight straight above you, step your back leg forward and stand up tall. This completes the TGU, which can and should be done in reverse back to the ground to complete one full repetition.
Summary:
While the TGU can quickly become a daunting movement to execute due to its plethora of technical nuances, I believe anybody can perform this movement. I encourage most individuals to start with little to no weight whatsoever while focusing on technique. Once you can perform this movement perfectly with a shoe or foam block on a closed fist without it falling off throughout the entire motion, it is then that you are ready to move on to using a light weight. If there is a particular step that you struggle with on this movement, practice it in isolation for several repetitions until you feel comfortable doing so.