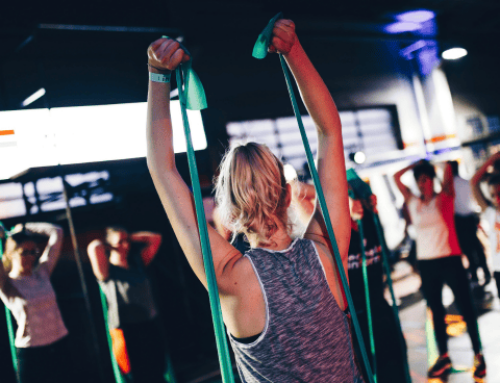
Building Strong and Mobile Shoulders, Part 3: Stability Training

In Part 1 and Part 2 of this series, we provided a self test to measure your shoulder health and a strength workout. We now cover stability training, the final piece of the puzzle for building strong and mobile shoulders.
To understand the concept of stability, imagine an anchor on a boat. An anchored boat can float around on the surface of the water, but it won’t completely drift away. Think of the shoulder’s mobility (range of motion, tissue flexibility and joint movement) as the length of your anchor line—the longer the line, the more you can drift before the current carries you away. Stability is the weight of your anchor—the heavier the anchor, the stronger the current you can withstand.
You want to maximize joint range of motion to increase skill execution for throwing and swinging, but you are limited by what you can successfully stabilize. If you are forced outside your zone of control, your performance will decrease and your risk of injury will increase.
Stability Training Myths
Most athletes mistake unstable surface training for true stabilization work. Although unstable surface training can be part of an advanced stabilization program, there are far better ways to maintain joint integrity in the presence of movement. Proper stability keeps the joint structures in optimal positions to allow freedom of movement within the range of joint mobility.
Packing the Shoulder
Concerning optimal shoulder stability, athletes need to understand the concept of the “packed shoulder.” Packing your shoulder refers to centering the upper arm bone in the shoulder socket to make sure all structures of the joint are in proper alignment for complete functionality. The trouble is, most athletes live in a rounded shoulder posture,with their arm bone pulled up and forward in the joint. Unsure where to position your shoulders? Do this: with your back to a wall, flatten your shoulder blades. The backs of your shoulders should touch the wall. This is the packed shoulder position you should maintain during all exercises.
The Role of the Rotator Cuff
Most athletes have seen traditional rotator cuff therapy exercises with a resistance band or a small dumbbell. Although these exercises are good for rehabilitation or strengthening a weakened muscle, they do little to facilitate the proper functioning of the rotator cuff muscles. The rotator cuff is not designed to create movement, but rather to stabilize the shoulder joint. When you throw a baseball or serve in tennis, the rotator cuff is what keeps your arm in the socket and controls the powerful forces pulling on it. Don’t believe me? Stand with your arm out to your side with a 90-degree bend in your elbow, then rotate just your arm to throw as far as you can. Now take two steps to retrieve that embarrassing toss before anyone sees you, and try again—but this time use a full throwing motion that incorporates your hips and a shoulder turn. Noting the giant increase in distance, you will fully appreciate the rotator cuff in its working role.
The Program
The Shoulder Stability Program begins with static control (holding a position); adds intensity by moving to dynamic stability (stabilizing the shoulder during a movement); and finishes with integrated patterns (exercises involving the muscles that act on the shoulder). By incorporating this program into your training, you can ensure optimal joint function, improve performance, and stave off injury.
Always start each exercise with proper shoulder alignment and maintain this natural arm position during movements.
1) Farmer’s Walks
- Hold a pair of heavy dumbbells (less than 25 lbs. for women and less than 50 lbs. for men)
- Assume proper posture with shoulders pulled back and away from ears
- Walk steadily for specified distance; avoid tilting, leaning or shrugging
Sets/Distance: 3×25 yards

2) Shoulder Tap to T Push-Up
- Assume Push-Up position with body in straight line
- Reach with right hand and touch left shoulder; do not tilt body
- Place hand back on ground to assume start position
- Repeat on opposite side
- Shift weight onto right hand
- Rotate upper body until shoulders are perpendicular to floor
- Extend left arm up to create straight line with arms
- Return to Push-Up position; repeat on opposite side
- Repeat sequence for specified reps
Sets/Reps: 2×8 each side

3) Bear Crawls
- Assume all-fours position with back parallel to ground and knees bent at 90-degree angle; keep head, back and butt in straight line
- Walk with alternating limbs; right arm and left leg step together and vice versa
- Repeat for specified distance
Sets/Distance: 3×20 yards forward and backward

4) Neutral-Grip Pull-Ups
- Place hands on neutral-grip bars with palms facing together; push heels together and squeeze butt to stabilize core
- Pull body up until chin is even with or over bar
- Lower until arms are fully extended
- Do not swing body or use legs for momentum
- Repeat for specified reps
Sets/Reps: 3×5

Source: Cook, Gray. Movement: Functional Movement Systems : Screening, Assessment, and Corrective Strategies. Aptos, Calif. On Target Publications, 2010.
Photo: weightliftingequipment.cc
RECOMMENDED FOR YOU


MOST POPULAR


Building Strong and Mobile Shoulders, Part 3: Stability Training
In Part 1 and Part 2 of this series, we provided a self test to measure your shoulder health and a strength workout. We now cover stability training, the final piece of the puzzle for building strong and mobile shoulders.
To understand the concept of stability, imagine an anchor on a boat. An anchored boat can float around on the surface of the water, but it won’t completely drift away. Think of the shoulder’s mobility (range of motion, tissue flexibility and joint movement) as the length of your anchor line—the longer the line, the more you can drift before the current carries you away. Stability is the weight of your anchor—the heavier the anchor, the stronger the current you can withstand.
You want to maximize joint range of motion to increase skill execution for throwing and swinging, but you are limited by what you can successfully stabilize. If you are forced outside your zone of control, your performance will decrease and your risk of injury will increase.
Stability Training Myths
Most athletes mistake unstable surface training for true stabilization work. Although unstable surface training can be part of an advanced stabilization program, there are far better ways to maintain joint integrity in the presence of movement. Proper stability keeps the joint structures in optimal positions to allow freedom of movement within the range of joint mobility.
Packing the Shoulder
Concerning optimal shoulder stability, athletes need to understand the concept of the “packed shoulder.” Packing your shoulder refers to centering the upper arm bone in the shoulder socket to make sure all structures of the joint are in proper alignment for complete functionality. The trouble is, most athletes live in a rounded shoulder posture,with their arm bone pulled up and forward in the joint. Unsure where to position your shoulders? Do this: with your back to a wall, flatten your shoulder blades. The backs of your shoulders should touch the wall. This is the packed shoulder position you should maintain during all exercises.
The Role of the Rotator Cuff
Most athletes have seen traditional rotator cuff therapy exercises with a resistance band or a small dumbbell. Although these exercises are good for rehabilitation or strengthening a weakened muscle, they do little to facilitate the proper functioning of the rotator cuff muscles. The rotator cuff is not designed to create movement, but rather to stabilize the shoulder joint. When you throw a baseball or serve in tennis, the rotator cuff is what keeps your arm in the socket and controls the powerful forces pulling on it. Don’t believe me? Stand with your arm out to your side with a 90-degree bend in your elbow, then rotate just your arm to throw as far as you can. Now take two steps to retrieve that embarrassing toss before anyone sees you, and try again—but this time use a full throwing motion that incorporates your hips and a shoulder turn. Noting the giant increase in distance, you will fully appreciate the rotator cuff in its working role.
The Program
The Shoulder Stability Program begins with static control (holding a position); adds intensity by moving to dynamic stability (stabilizing the shoulder during a movement); and finishes with integrated patterns (exercises involving the muscles that act on the shoulder). By incorporating this program into your training, you can ensure optimal joint function, improve performance, and stave off injury.
Always start each exercise with proper shoulder alignment and maintain this natural arm position during movements.
1) Farmer’s Walks
- Hold a pair of heavy dumbbells (less than 25 lbs. for women and less than 50 lbs. for men)
- Assume proper posture with shoulders pulled back and away from ears
- Walk steadily for specified distance; avoid tilting, leaning or shrugging
Sets/Distance: 3×25 yards
2) Shoulder Tap to T Push-Up
- Assume Push-Up position with body in straight line
- Reach with right hand and touch left shoulder; do not tilt body
- Place hand back on ground to assume start position
- Repeat on opposite side
- Shift weight onto right hand
- Rotate upper body until shoulders are perpendicular to floor
- Extend left arm up to create straight line with arms
- Return to Push-Up position; repeat on opposite side
- Repeat sequence for specified reps
Sets/Reps: 2×8 each side
3) Bear Crawls
- Assume all-fours position with back parallel to ground and knees bent at 90-degree angle; keep head, back and butt in straight line
- Walk with alternating limbs; right arm and left leg step together and vice versa
- Repeat for specified distance
Sets/Distance: 3×20 yards forward and backward
4) Neutral-Grip Pull-Ups
- Place hands on neutral-grip bars with palms facing together; push heels together and squeeze butt to stabilize core
- Pull body up until chin is even with or over bar
- Lower until arms are fully extended
- Do not swing body or use legs for momentum
- Repeat for specified reps
Sets/Reps: 3×5
Source: Cook, Gray. Movement: Functional Movement Systems : Screening, Assessment, and Corrective Strategies. Aptos, Calif. On Target Publications, 2010.
Photo: weightliftingequipment.cc