The Best Soccer Drills For Youth Athletes
Soccer players need good ball skills. They also need to use these skills under pressure and make good decisions on the pitch. Apart from the penalty shot, there is rarely a time when the same skill is used the same way in a game. Teammates and opponents are constantly moving. The ball bounces differently according to the weather, and pitch and fatigue make everything harder. The adage, ‘Train the way you play,’ applies to soccer drills. There must be some element of movement, decision-making, and pressure for transfer to the match to occur. Here are some ideas for drills that allow you to develop ball skills and understand how they can be applied in a match.
The Best Soccer Drills For Youth Athletes
Soccer Warm-Up
Soccer players talk about developing a touch. This can be reinforced and developed in the warm-up. Each player has a ball. They dribble in a small area and stop the ball by placing the boot’s sole on top when the coach says ‘stop’. The context is controlling the ball in a crowded area. Stop the ball with left and right foot alternately. When the coach says ‘go’, pull the ball back and change the direction of travel. Players have to keep the ball close in order to be able to stop on command.
Pressure can be added by adding an elimination like musical statues so that the last player to stop is out. Don’t send them to the sidelines. Send them to another area so that they continue to practice. Otherwise, the least able players are eliminated first and get to practice less).
Next, they can work in pairs: one person has the ball, the other players are marking and shadowing. The area they work in can be increased, and players are encouraged to accelerate for 3-4 steps when they change direction.
Kick and Stop
In pairs, kick the ball to each other and stop with one touch before returning it. Again, make sure left and right feet are used for kicking and stopping. Try using different foot parts to kick: inside, outside, instep. Start close together: 5 meters is suitable.
Quickly change this activity to add challenges such as:
- Increase the distance between the players.
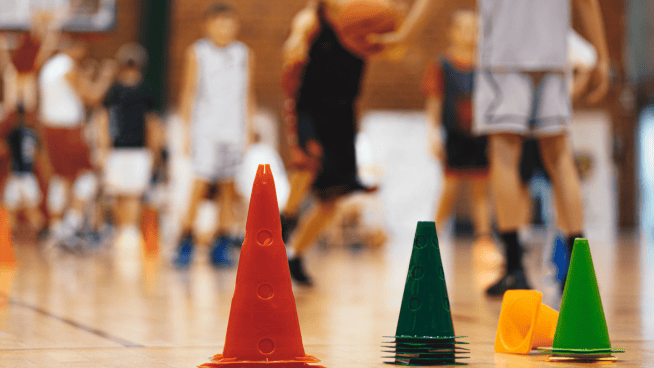
- Put a cone between them so that the ball has to go around the cone.
- Put two cones down so that the ball has to go through the gap.
- Use a hurdle or kit bag, so the ball must go over the obstacle.
Putting time pressure on ‘as many as you can in 30 seconds’ helps the players focus on the task and adds competition. Sometimes these drills are left to carry on for 10 minutes, and the players lose intensity and concentration. The scheme can be run for 10 minutes, but change something within it every 2 minutes.
Throw-in and catch the ball with the body
As players progress to bigger pitches, the ball travels further, and they need to control it with different parts of the body. They can experiment with different ways of doing this with a partner practicing their throw-ins. Start about 5 meters apart and progress as far as the thrower can throw.
Encourage the players to move towards the ball’s flight (anticipation) and use the chest, stomach, and thighs to control the ball down to their feet. Some direct coaching about hollowing the body shape might be needed but using the cue ‘soften the landing’ will help them understand the concept. Swap the players around after a set limit of throws (no more than 10).
An opponent can be added to allow jostling for position and practicing control under pressure.
4 versus 1 passing practice (3 vs. 1 5 vs. 2)
These progressions can be used in between the previous three drills. That way the players are moving from more isolated drills to ‘game sense type drills.
Have four players in a 10 meter by 10 meters pass the ball to each other, and the fifth player is trying to tackle or intercept the ball. The four players each stand in a corner to utilize the whole space. Novices find movement into space and awareness of where they should be without the ball difficult. This helps them get the basics right.
The next progression is three vs. 1 in the same area. Now, movement is allowed, and the player with the ball probably only has one choice of ‘free’ player to pass to (the defender will mark the other one). The two teammates have to think about where to help the player with the ball.
If your players manage the three vs. one well or some of the team, then the next progression is five vs. 2 in a larger area. The player with the ball now has to deal with the pressure of one defender and be aware of where the other defender is: they have to pass accurately and make a good decision! Defenders learn how to cut angles and anticipate where the pass might go.
Here you will see basic passing techniques go awry and balls flying out of the area. You can then return to one of the earlier drills to regain the players’ touch and repeat the sequence.
Coaches often get trapped into a linear framework and keep pushing through the drills to get to a game at the end. The players can learn and refresh by inserting a loop and then try again. You can then progress to small-sided games with a goal as a target before progressing to the entire game.
This way, players get lots of touches of the ball and make lots of decisions before they are asked to perform on the big stage. You are laying the foundations for success.
RECOMMENDED FOR YOU
MOST POPULAR
The Best Soccer Drills For Youth Athletes
Soccer players need good ball skills. They also need to use these skills under pressure and make good decisions on the pitch. Apart from the penalty shot, there is rarely a time when the same skill is used the same way in a game. Teammates and opponents are constantly moving. The ball bounces differently according to the weather, and pitch and fatigue make everything harder. The adage, ‘Train the way you play,’ applies to soccer drills. There must be some element of movement, decision-making, and pressure for transfer to the match to occur. Here are some ideas for drills that allow you to develop ball skills and understand how they can be applied in a match.
The Best Soccer Drills For Youth Athletes
Soccer Warm-Up
Soccer players talk about developing a touch. This can be reinforced and developed in the warm-up. Each player has a ball. They dribble in a small area and stop the ball by placing the boot’s sole on top when the coach says ‘stop’. The context is controlling the ball in a crowded area. Stop the ball with left and right foot alternately. When the coach says ‘go’, pull the ball back and change the direction of travel. Players have to keep the ball close in order to be able to stop on command.
Pressure can be added by adding an elimination like musical statues so that the last player to stop is out. Don’t send them to the sidelines. Send them to another area so that they continue to practice. Otherwise, the least able players are eliminated first and get to practice less).
Next, they can work in pairs: one person has the ball, the other players are marking and shadowing. The area they work in can be increased, and players are encouraged to accelerate for 3-4 steps when they change direction.
Kick and Stop
In pairs, kick the ball to each other and stop with one touch before returning it. Again, make sure left and right feet are used for kicking and stopping. Try using different foot parts to kick: inside, outside, instep. Start close together: 5 meters is suitable.
Quickly change this activity to add challenges such as:
- Increase the distance between the players.
- Put a cone between them so that the ball has to go around the cone.
- Put two cones down so that the ball has to go through the gap.
- Use a hurdle or kit bag, so the ball must go over the obstacle.
Putting time pressure on ‘as many as you can in 30 seconds’ helps the players focus on the task and adds competition. Sometimes these drills are left to carry on for 10 minutes, and the players lose intensity and concentration. The scheme can be run for 10 minutes, but change something within it every 2 minutes.
Throw-in and catch the ball with the body
As players progress to bigger pitches, the ball travels further, and they need to control it with different parts of the body. They can experiment with different ways of doing this with a partner practicing their throw-ins. Start about 5 meters apart and progress as far as the thrower can throw.
Encourage the players to move towards the ball’s flight (anticipation) and use the chest, stomach, and thighs to control the ball down to their feet. Some direct coaching about hollowing the body shape might be needed but using the cue ‘soften the landing’ will help them understand the concept. Swap the players around after a set limit of throws (no more than 10).
An opponent can be added to allow jostling for position and practicing control under pressure.
4 versus 1 passing practice (3 vs. 1 5 vs. 2)
These progressions can be used in between the previous three drills. That way the players are moving from more isolated drills to ‘game sense type drills.
Have four players in a 10 meter by 10 meters pass the ball to each other, and the fifth player is trying to tackle or intercept the ball. The four players each stand in a corner to utilize the whole space. Novices find movement into space and awareness of where they should be without the ball difficult. This helps them get the basics right.
The next progression is three vs. 1 in the same area. Now, movement is allowed, and the player with the ball probably only has one choice of ‘free’ player to pass to (the defender will mark the other one). The two teammates have to think about where to help the player with the ball.
If your players manage the three vs. one well or some of the team, then the next progression is five vs. 2 in a larger area. The player with the ball now has to deal with the pressure of one defender and be aware of where the other defender is: they have to pass accurately and make a good decision! Defenders learn how to cut angles and anticipate where the pass might go.
Here you will see basic passing techniques go awry and balls flying out of the area. You can then return to one of the earlier drills to regain the players’ touch and repeat the sequence.
Coaches often get trapped into a linear framework and keep pushing through the drills to get to a game at the end. The players can learn and refresh by inserting a loop and then try again. You can then progress to small-sided games with a goal as a target before progressing to the entire game.
This way, players get lots of touches of the ball and make lots of decisions before they are asked to perform on the big stage. You are laying the foundations for success.

