Two agility drills from Minnesota volleyball
By: Chad Zimmerman
Although Sarah Wiley isn’t a player on the court, she is an essential part of the University of Minnesota volleyball team. In fact, she is the reason the Gophers have some of the most agile players with the quickest feet in collegiate volleyball.
Not only did her work produce one of the greatest players in Minnesota history, Cassie Busse, but Wiley helped the 2004 team finish second in the nation.
When Busse arrived in Minnesota, she had the physical attributes of a great volleyball player—height and strength—but she needed guidance. “[She] was one of those players who was a developmental athlete all the way,” Wiley says. Fortunately, Wiley had a plan for improved quickness and agility that helped Busse reach her full potential.
By the time the 6’2″ outside hitter finished her senior season in the winter of 2003, she was named Big Ten Player of the Year, gained AVCA All-American and CoSIDA Academic All-American status twice and received the Big Ten Medal of Honor Award. Additionally, her name is scattered throughout the Minnesota Gophers’ record book.
Wiley used the same program that helped Busse achieve these accolades to help advance the Gophers—including All-Americans Kelly Bowman and Paula Gentil and All-Region performer Erin Martin—to the 2004 NCAA tournament championship game. The successful program entails two days a week of quickness drills and two days a week of agility training.
“The quick reactive movements required in this sport and the fact there are so many different things that can happen in volleyball that don’t happen in other sports, such as deflections, it’s really necessary the athletes have quick feet. But also, that they have control over their center of balance so they don’t overextend themselves in one direction to the point they can’t get back in another,” explains Wiley.
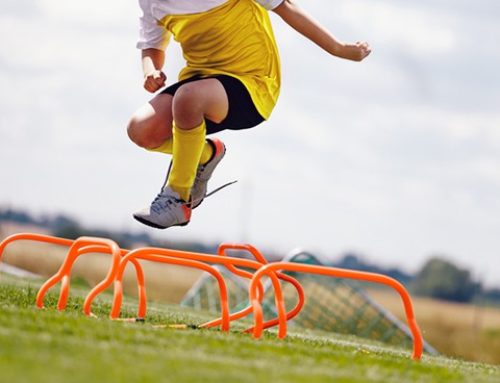
Dot Drills and Line Hops—performed double-and single-legged—are the main tools to train quickness. Agility drills include the Fan Drill and Thunder-Feet.
“I think that with doing the single-and double-leg work and doing lots of multiple direction work, our athletes are stronger. By that I mean stronger in ankles, knees, hips—places where we’re very susceptible to injury,” says Wiley.
She adds visual and audible cues to increase drill difficulty as comfort and ability with the drills grow. The visual cues help simulate game situations where movement patterns and change of direction occur rapidly.
“Cassie really excelled at these drills. By practicing and learning these skills, she was able to get a lot faster. And, what’s more important is she was able to take that and apply it elsewhere,” Wiley says. “All this stuff doesn’t matter if it doesn’t apply to the volleyball court.”
Quickness Days Monday and Thursday
Dot Drills
“The objective is for the athlete to move her feet as fast as possible through the pattern touching all the marks with the appropriate foot or feet, and keeping her center of balance as close as possible to the center of the mat at all times,” says Wiley.
To perform Dot Drills, use a dot mat or set up a dot pattern on the ground with tape. Use four dots to make the shape of a square; each side should be about a yard. Place a fifth dot in the middle of the square.
On a given day, the Gophers perform 2 to 4 different patterns. Patterns performed with double-leg movement are done for 15 to 20 seconds and single-leg movements are performed for 5 to 8 seconds. Between sets and patterns, rest for 45 seconds to a minute.
Dot Pattern Options:
Hourglass
Move around the pattern in an hourglass shape. Start at 5, hop forward and left to 3; forward and right to 2; left to 1; back and right to 3; back and left to 4; and last, across to 5. Perform this drill double-leg then single-leg with the right and then left leg.
There-and-Back
Start at 3 and hop back and right to 5. Then, hop immediately back to 3. Next, hop forward and right to 2, and then, immediately back to 3. Next, hop forward and left to 1 and immediately back to 3. Repeat this pattern until you complete There-and-Back for each corner. Perform double-leg and single-leg with the right then the left leg.
Small Arrow Up
Start at 4 and hop forward and right to 3. Then hop back and right to 5. Lastly, hop left to 4. The drill can be performed in the opposite direction double-and single-legged.
Small Arrow Down
Start at 2 facing away from the center. Hop back and left to 3. Then, hop forward and right to 1. Last, hop right to 2. Perform clockwise or counterclockwise, double-and single-legged.
Right Triangle 1
Start at 5 facing the center. Hop forward and left to 3 and then 1. Next, hop all the way back to 4 and lastly, back to 5. Perform clockwise or counterclockwise, double-and single-legged.
Right Triangle 2
Start at 4 facing the center. Hop forward and right to 3 and then to 2. Next, hop all the way back to 5 and last, back to 4. Perform clockwise or counterclockwise, double-and single-legged.
Line Hops
To perform line hops, find a set of lines on the court that intersect to form a plus sign. Starting with the top left corner, number the boxes 1 through 4 in a clockwise pattern. Then, constantly repeat a given pattern hopping from square to square for the designated time.
“The emphasis here is to keep their center of balance right over the middle where the lines intersect,” explains Wiley.
All patterns can be performed double-legged and single-legged for the right and left leg. Perform 2 to 3 sets of 2 to 4 different patterns a day. When performing double-leg patterns, hop for 15 to 20 seconds and rest for 45 to 60 seconds. For single-leg, repeat the pattern for 8 to 15 seconds with 30 to 45 seconds rest.
Example Patterns:
1-2; 1-3; 1-4; 2-4; 1-2-3; 3-2-1; 1-2-4; 4-2-1; 4-3-2; 2-3-4; 3-1-4; 4-1-3
Quickness Adaptations
Only after you master the given patterns for Dot Drills and Line Hops, add visual cues to increase difficulty.
To use visual cues, use a set of different color cards. Designate a certain color as the hot color. Then, while performing a Dot Drill or Line Hop pattern, have a partner flash different color cards. When your partner flashes the hot color, immediately change direction of the pattern or start a new pattern. When you first start to add visual cues, only use two colors. Eventually, work in more colored cards to increase drill difficulty. Over the course of the 20 seconds of the drill, your partner should flash the hot color 3 to 4 times.
Example:
Start with two cards—one red and one blue. Designate red as the hot color. Perform 20 seconds of the dot drill “Small Arrow Up” moving in the clockwise direction. Next, have your partner hold the cards behind her back and then flash a card at you. Once you see the red card, perform the drill counterclockwise. The next time you see the red card, perform the drill clockwise.
Agility Days – Tuesday and Thursday
Fan Drill
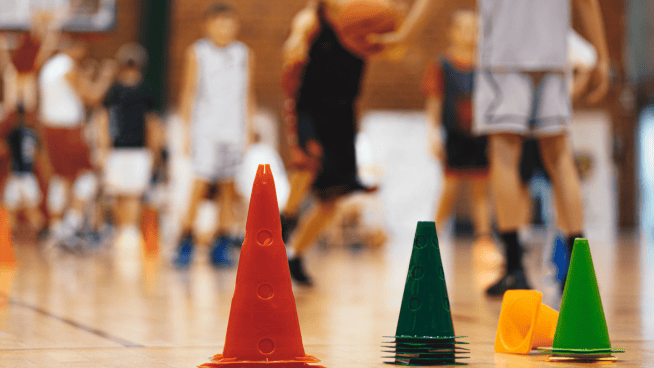
Set up 3 cones on the 10-foot line. Cone 1 is the left cone, cone 2 is the middle cone and 3 is the right cone. Starting at the middle baseline, have a coach, who is standing at the net, shout cone numbers in random order. Sprint up and touch the cone with the appropriate hand (left cone, left hand; right cone, right hand. For the middle cone, alternate which hand you use to tag the cone.) To get back to the starting point, perform a defensive shuffle. Once back at the starting point, the coach shouts the next cue.
“It’s just a random reaction drill working on a verbal cue…And what you’re looking for from the athlete is for her to get as many touches as possible in that time ( 20 seconds), but do so with good, low defensive posture and good, quick, short footsteps,” says Wiley.
*Coach’s point: Wiley warns to avoid false stepping. When coming back to the baseline and the coach yells 2, for example, try to take the next, first step toward the middle cone.
Perform 2 to 3 sets of 20 to 30 seconds. Try to tag the cones 3 to 4 times within each set. Rest for a minute to a minute and a half between sets.
Thunder-Feet
Start on the baseline for this drill. Partner stands near the net. On her “go,” sprint forward. Then, have your partner point left, right, forward or back. Move in the direction of the given hand cue. Shuffle on left and right cues; sprint on a forward cue. When your partner points back, perform a defensive shuffle back toward the baseline by opening your hips in the same direction as the arm your partner uses to point.
To end the drill, on your partner’s call, sprint through the half court line.
Perform 2 to 3 sets of this drill for 15 to 20 seconds per set. Take between 45 to 60 seconds rest between sets.
RECOMMENDED FOR YOU

MOST POPULAR


Two agility drills from Minnesota volleyball
By: Chad Zimmerman
Although Sarah Wiley isn’t a player on the court, she is an essential part of the University of Minnesota volleyball team. In fact, she is the reason the Gophers have some of the most agile players with the quickest feet in collegiate volleyball.
Not only did her work produce one of the greatest players in Minnesota history, Cassie Busse, but Wiley helped the 2004 team finish second in the nation.
When Busse arrived in Minnesota, she had the physical attributes of a great volleyball player—height and strength—but she needed guidance. “[She] was one of those players who was a developmental athlete all the way,” Wiley says. Fortunately, Wiley had a plan for improved quickness and agility that helped Busse reach her full potential.
By the time the 6’2″ outside hitter finished her senior season in the winter of 2003, she was named Big Ten Player of the Year, gained AVCA All-American and CoSIDA Academic All-American status twice and received the Big Ten Medal of Honor Award. Additionally, her name is scattered throughout the Minnesota Gophers’ record book.
Wiley used the same program that helped Busse achieve these accolades to help advance the Gophers—including All-Americans Kelly Bowman and Paula Gentil and All-Region performer Erin Martin—to the 2004 NCAA tournament championship game. The successful program entails two days a week of quickness drills and two days a week of agility training.
“The quick reactive movements required in this sport and the fact there are so many different things that can happen in volleyball that don’t happen in other sports, such as deflections, it’s really necessary the athletes have quick feet. But also, that they have control over their center of balance so they don’t overextend themselves in one direction to the point they can’t get back in another,” explains Wiley.
Dot Drills and Line Hops—performed double-and single-legged—are the main tools to train quickness. Agility drills include the Fan Drill and Thunder-Feet.
“I think that with doing the single-and double-leg work and doing lots of multiple direction work, our athletes are stronger. By that I mean stronger in ankles, knees, hips—places where we’re very susceptible to injury,” says Wiley.
She adds visual and audible cues to increase drill difficulty as comfort and ability with the drills grow. The visual cues help simulate game situations where movement patterns and change of direction occur rapidly.
“Cassie really excelled at these drills. By practicing and learning these skills, she was able to get a lot faster. And, what’s more important is she was able to take that and apply it elsewhere,” Wiley says. “All this stuff doesn’t matter if it doesn’t apply to the volleyball court.”
Quickness Days Monday and Thursday
Dot Drills
“The objective is for the athlete to move her feet as fast as possible through the pattern touching all the marks with the appropriate foot or feet, and keeping her center of balance as close as possible to the center of the mat at all times,” says Wiley.
To perform Dot Drills, use a dot mat or set up a dot pattern on the ground with tape. Use four dots to make the shape of a square; each side should be about a yard. Place a fifth dot in the middle of the square.
On a given day, the Gophers perform 2 to 4 different patterns. Patterns performed with double-leg movement are done for 15 to 20 seconds and single-leg movements are performed for 5 to 8 seconds. Between sets and patterns, rest for 45 seconds to a minute.
Dot Pattern Options:
Hourglass
Move around the pattern in an hourglass shape. Start at 5, hop forward and left to 3; forward and right to 2; left to 1; back and right to 3; back and left to 4; and last, across to 5. Perform this drill double-leg then single-leg with the right and then left leg.
There-and-Back
Start at 3 and hop back and right to 5. Then, hop immediately back to 3. Next, hop forward and right to 2, and then, immediately back to 3. Next, hop forward and left to 1 and immediately back to 3. Repeat this pattern until you complete There-and-Back for each corner. Perform double-leg and single-leg with the right then the left leg.
Small Arrow Up
Start at 4 and hop forward and right to 3. Then hop back and right to 5. Lastly, hop left to 4. The drill can be performed in the opposite direction double-and single-legged.
Small Arrow Down
Start at 2 facing away from the center. Hop back and left to 3. Then, hop forward and right to 1. Last, hop right to 2. Perform clockwise or counterclockwise, double-and single-legged.
Right Triangle 1
Start at 5 facing the center. Hop forward and left to 3 and then 1. Next, hop all the way back to 4 and lastly, back to 5. Perform clockwise or counterclockwise, double-and single-legged.
Right Triangle 2
Start at 4 facing the center. Hop forward and right to 3 and then to 2. Next, hop all the way back to 5 and last, back to 4. Perform clockwise or counterclockwise, double-and single-legged.
Line Hops
To perform line hops, find a set of lines on the court that intersect to form a plus sign. Starting with the top left corner, number the boxes 1 through 4 in a clockwise pattern. Then, constantly repeat a given pattern hopping from square to square for the designated time.
“The emphasis here is to keep their center of balance right over the middle where the lines intersect,” explains Wiley.
All patterns can be performed double-legged and single-legged for the right and left leg. Perform 2 to 3 sets of 2 to 4 different patterns a day. When performing double-leg patterns, hop for 15 to 20 seconds and rest for 45 to 60 seconds. For single-leg, repeat the pattern for 8 to 15 seconds with 30 to 45 seconds rest.
Example Patterns:
1-2; 1-3; 1-4; 2-4; 1-2-3; 3-2-1; 1-2-4; 4-2-1; 4-3-2; 2-3-4; 3-1-4; 4-1-3
Quickness Adaptations
Only after you master the given patterns for Dot Drills and Line Hops, add visual cues to increase difficulty.
To use visual cues, use a set of different color cards. Designate a certain color as the hot color. Then, while performing a Dot Drill or Line Hop pattern, have a partner flash different color cards. When your partner flashes the hot color, immediately change direction of the pattern or start a new pattern. When you first start to add visual cues, only use two colors. Eventually, work in more colored cards to increase drill difficulty. Over the course of the 20 seconds of the drill, your partner should flash the hot color 3 to 4 times.
Example:
Start with two cards—one red and one blue. Designate red as the hot color. Perform 20 seconds of the dot drill “Small Arrow Up” moving in the clockwise direction. Next, have your partner hold the cards behind her back and then flash a card at you. Once you see the red card, perform the drill counterclockwise. The next time you see the red card, perform the drill clockwise.
Agility Days – Tuesday and Thursday
Fan Drill
Set up 3 cones on the 10-foot line. Cone 1 is the left cone, cone 2 is the middle cone and 3 is the right cone. Starting at the middle baseline, have a coach, who is standing at the net, shout cone numbers in random order. Sprint up and touch the cone with the appropriate hand (left cone, left hand; right cone, right hand. For the middle cone, alternate which hand you use to tag the cone.) To get back to the starting point, perform a defensive shuffle. Once back at the starting point, the coach shouts the next cue.
“It’s just a random reaction drill working on a verbal cue…And what you’re looking for from the athlete is for her to get as many touches as possible in that time ( 20 seconds), but do so with good, low defensive posture and good, quick, short footsteps,” says Wiley.
*Coach’s point: Wiley warns to avoid false stepping. When coming back to the baseline and the coach yells 2, for example, try to take the next, first step toward the middle cone.
Perform 2 to 3 sets of 20 to 30 seconds. Try to tag the cones 3 to 4 times within each set. Rest for a minute to a minute and a half between sets.
Thunder-Feet
Start on the baseline for this drill. Partner stands near the net. On her “go,” sprint forward. Then, have your partner point left, right, forward or back. Move in the direction of the given hand cue. Shuffle on left and right cues; sprint on a forward cue. When your partner points back, perform a defensive shuffle back toward the baseline by opening your hips in the same direction as the arm your partner uses to point.
To end the drill, on your partner’s call, sprint through the half court line.
Perform 2 to 3 sets of this drill for 15 to 20 seconds per set. Take between 45 to 60 seconds rest between sets.