Become a Better Mover With This 10-Minute Foot and Ankle Prep Series
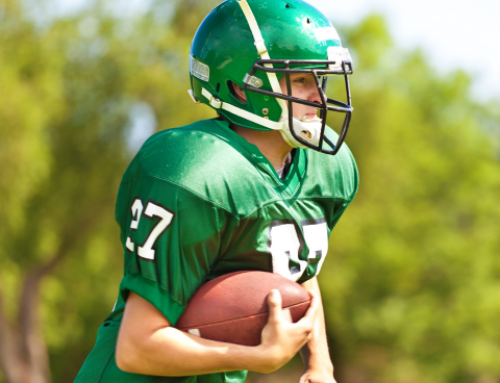
The foot-and-ankle complex is perhaps the most overlooked region in sports.
Not only are these two areas that tend to get frequently injured, but they’re also absolutely critical to elite performance.
Yet as the breakdown of these structures occurs more and more frequently, athletes have responded not by addressing the weaknesses at their source, but instead strapping on ankle braces, donning hightop shoes, and/or mummifying their ankles in athletic tape.
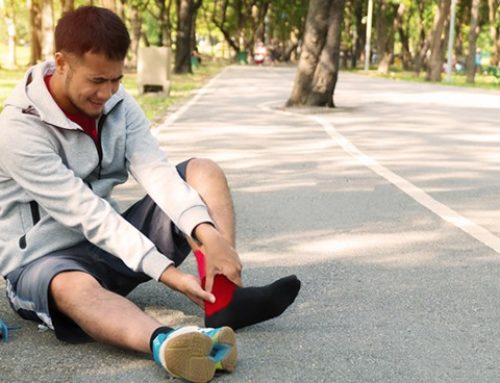
Sprained ankles, turf toes, shin splints, plantar fasciitis—these nagging injuries plague many an athlete, yet we rarely take the necessary actions to take better care of our feet and the structures around them.
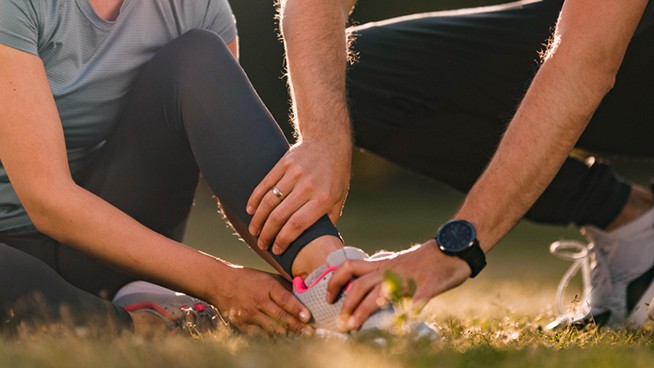
Consistently utilizing a three-stage prep process for the foot and ankle can be a great investment of time for the modern athlete.
The sequence listed below is a preparation for the foot and ankle. This sequence can be done before or after a lower-body focused day, can serve as an extra workout performed on its own, or even be done before a practice or game.
You can swap some additional movements if you’d like, although I would keep the sequence focused on the various movement patterns of the foot and ankle (dorsi flexion, plantar flexion, inversion, eversion, rotation, etc.) to ensure effectiveness.
This sequence is most effective if performed barefoot. Shoes will restrict the potential range of movement of the foot and dampen the activation!
1. Self Myofascial Release (SMR)
Rollout Your Feet: You can use lacrosse ball or tennis ball. Spend 1-2 total minutes rolling. Go through this slowly, making sure to roll out the entire foot, heel, edges of foot, toes, etc.
Medicine Ball Rollout on Lower Leg: You can also use foam roller or stick. Focus on shins, peroneals, calves, etc. Spend 1-2 total minutes rolling your lower leg. Go through slowly as you work throughout the entire lower leg. Try to maintain steady pressure at all times.
2. Mobility
Ankle Rocks: 20 reps on each foot. This can be done with your toes elevated on a small plate, with band traction, or both. Stand as far back as possible where your knee can still touch the wall, but the heel remains down. Progress through the series once the previous movement gets too easy.
FRC Seated Ankle CARS (Circles): 10 reps each way. Lock the leg in by holding your shin tight, work to only move the ankle. Slowly draw the biggest circle you possibly can with your foot. If you lose control at certain spots, then you need to focus on improving the control at those areas.
3. Activation/Strength
Heel/Toe Raises: 10 reps done slowly with a pause at top, 10 reps done quickly with no pause. Keep hands on the hips and your body as erect as possible. Don’t push your hips back!
Band Ankle Inversion/Eversion: 15 reps each side. Elevate the foot and try to control the range of motion as best as possible.
Foam Marching: 1-2 total minutes. Find a piece of foam large enough to comfortably stand on. March in place, picking your feet up all the way off the foam. Can progress by holding onto dumbbells or increasing the duration of marching.
If you integrate this series into your routine a couple times a week, your feet and ankles will be better-prepared for explosive athletic actions and more resilient to injury.
If you’re interested in more info, let’s dive into each stage a little deeper.
The first stage is going to be Self Myofascial Release (SMR). SMR is essentially self massage through the use of various tools; such as a foam roller, a tennis ball, a lacrosse ball, a massage stick, a PVC pipe and even a medicine ball.
When performing SMR, there is no true right or wrong. Each individual will experience different sensations, even if they are using the same tool and working over the same muscle group.
With that in mind, a good rule of thumb to follow is to start with a less dense and less intense tool, such as a tennis ball or softer foam roller, and then slowly progress to more intense, denser tools like a lacrosse ball or a firmer foam roller. Another good rule to follow is to move slowly.
When you are performing SMR, you want to be relaxed and focus on your breathing to create a more optimal experience. Try to breathe into the trigger points that you are working out and slowly incorporate movements into the process to discover new trigger points and areas that need work. It is a form of self discovery and helps an individual understand their body better.
The purpose of SMR is to help improve the quality and extensibility of the tissue. Along with that, it will help reduce scar tissue, adhesions and downregulate the nervous system. This will help create more efficient muscular contractions and allow the individual to move with less restrictions throughout the session.
The second stage is going to be Mobility. This stage is going to focus on improving the controllable range of motion an individual possesses.
This stage should not be neglected or rushed through as mobility is a huge limiting factor with several individuals. In fact, this is something that should be monitored and progressed once an individual shows competence in the drills.
The third and final stage is going to be Activation. This stage will include the final movements before the individual moves on to the session, so we have to make sure that necessary muscles are primed and firing. Much like the mobility stage the activation stage should not be rushed and the individual should focus in and perform the movements with the greatest intent.
Each stage will take around 3-5 minutes and should include 1-3 different movements. This same SMR, Mobilize, Activate formula can be used to create quick, effective prep series for any area(s) of the body!
Photo Credit: kali9/iStock
READ MORE:
RECOMMENDED FOR YOU

MOST POPULAR


Become a Better Mover With This 10-Minute Foot and Ankle Prep Series
The foot-and-ankle complex is perhaps the most overlooked region in sports.
Not only are these two areas that tend to get frequently injured, but they’re also absolutely critical to elite performance.
Yet as the breakdown of these structures occurs more and more frequently, athletes have responded not by addressing the weaknesses at their source, but instead strapping on ankle braces, donning hightop shoes, and/or mummifying their ankles in athletic tape.
Sprained ankles, turf toes, shin splints, plantar fasciitis—these nagging injuries plague many an athlete, yet we rarely take the necessary actions to take better care of our feet and the structures around them.
Consistently utilizing a three-stage prep process for the foot and ankle can be a great investment of time for the modern athlete.
The sequence listed below is a preparation for the foot and ankle. This sequence can be done before or after a lower-body focused day, can serve as an extra workout performed on its own, or even be done before a practice or game.
You can swap some additional movements if you’d like, although I would keep the sequence focused on the various movement patterns of the foot and ankle (dorsi flexion, plantar flexion, inversion, eversion, rotation, etc.) to ensure effectiveness.
This sequence is most effective if performed barefoot. Shoes will restrict the potential range of movement of the foot and dampen the activation!
1. Self Myofascial Release (SMR)
Rollout Your Feet: You can use lacrosse ball or tennis ball. Spend 1-2 total minutes rolling. Go through this slowly, making sure to roll out the entire foot, heel, edges of foot, toes, etc.
Medicine Ball Rollout on Lower Leg: You can also use foam roller or stick. Focus on shins, peroneals, calves, etc. Spend 1-2 total minutes rolling your lower leg. Go through slowly as you work throughout the entire lower leg. Try to maintain steady pressure at all times.
2. Mobility
Ankle Rocks: 20 reps on each foot. This can be done with your toes elevated on a small plate, with band traction, or both. Stand as far back as possible where your knee can still touch the wall, but the heel remains down. Progress through the series once the previous movement gets too easy.
FRC Seated Ankle CARS (Circles): 10 reps each way. Lock the leg in by holding your shin tight, work to only move the ankle. Slowly draw the biggest circle you possibly can with your foot. If you lose control at certain spots, then you need to focus on improving the control at those areas.
3. Activation/Strength
Heel/Toe Raises: 10 reps done slowly with a pause at top, 10 reps done quickly with no pause. Keep hands on the hips and your body as erect as possible. Don’t push your hips back!
Band Ankle Inversion/Eversion: 15 reps each side. Elevate the foot and try to control the range of motion as best as possible.
Foam Marching: 1-2 total minutes. Find a piece of foam large enough to comfortably stand on. March in place, picking your feet up all the way off the foam. Can progress by holding onto dumbbells or increasing the duration of marching.
If you integrate this series into your routine a couple times a week, your feet and ankles will be better-prepared for explosive athletic actions and more resilient to injury.
If you’re interested in more info, let’s dive into each stage a little deeper.
The first stage is going to be Self Myofascial Release (SMR). SMR is essentially self massage through the use of various tools; such as a foam roller, a tennis ball, a lacrosse ball, a massage stick, a PVC pipe and even a medicine ball.
When performing SMR, there is no true right or wrong. Each individual will experience different sensations, even if they are using the same tool and working over the same muscle group.
With that in mind, a good rule of thumb to follow is to start with a less dense and less intense tool, such as a tennis ball or softer foam roller, and then slowly progress to more intense, denser tools like a lacrosse ball or a firmer foam roller. Another good rule to follow is to move slowly.
When you are performing SMR, you want to be relaxed and focus on your breathing to create a more optimal experience. Try to breathe into the trigger points that you are working out and slowly incorporate movements into the process to discover new trigger points and areas that need work. It is a form of self discovery and helps an individual understand their body better.
The purpose of SMR is to help improve the quality and extensibility of the tissue. Along with that, it will help reduce scar tissue, adhesions and downregulate the nervous system. This will help create more efficient muscular contractions and allow the individual to move with less restrictions throughout the session.
The second stage is going to be Mobility. This stage is going to focus on improving the controllable range of motion an individual possesses.
This stage should not be neglected or rushed through as mobility is a huge limiting factor with several individuals. In fact, this is something that should be monitored and progressed once an individual shows competence in the drills.
The third and final stage is going to be Activation. This stage will include the final movements before the individual moves on to the session, so we have to make sure that necessary muscles are primed and firing. Much like the mobility stage the activation stage should not be rushed and the individual should focus in and perform the movements with the greatest intent.
Each stage will take around 3-5 minutes and should include 1-3 different movements. This same SMR, Mobilize, Activate formula can be used to create quick, effective prep series for any area(s) of the body!
Photo Credit: kali9/iStock
READ MORE: