The Importance of Pillar Strength

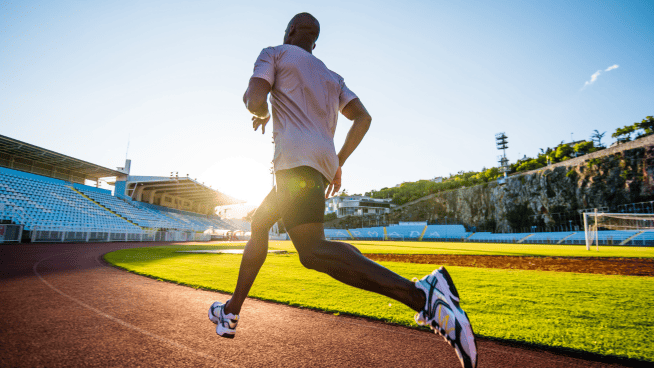
Athletes come in all forms—the professional hockey player, the runner who has an early start at the office and the high school starting pitcher, to name a few. Other than the fact that we are all human, what do we have in common? We all need pillar strength.
Pillar strength is a widely used term, but it is also widely misunderstood. Most commonly, it conjures up images and descriptions of static Front Planks and Side Planks held for time, or Crunches performed on a physioball. Pillar strength is much more than that.
What Is the Pillar?
The Pillar refers to the shoulders, torso and hips, so it is the center of all leg and arm movement. If you want to be a high-functioning athlete, you need a high-functioning pillar. A poor functioning pillar decreases your performance potential and increases your risk of injury.
For example, if I am a high school starting pitcher trying to throw a 80-mph fastball with just my arm, I limit the speed of the ball and put myself at risk for shoulder injury. If I am a runner with an early start at the office and I roll out of bed and straight onto the pavement, I limit my running potential and put myself at risk for leg and back injuries.
What Is Pillar Strength?
Pillar strength is what determines whether your pillar is high- or low-functioning. It allows you to walk, snatch, sprint and move with far less risk for injury and greater power.
How Do You Build Pillar Strength?
Pillar strength exercises are any movements aimed at improving the function of the pillar, including but not limited to: soft tissue work (foam rolling, massage sticking and trigger point therapy); mobility work (passive, active and dynamic stretching aimed at improving the range of motion of a joint and/or muscle); and stability work (movements aimed at improving the strength and activation of a muscle or joint).
The best time to do pillar strength work is at the beginning of your workout or activity. The goal is to prepare and prime the pillar for activity, while not fatiguing it before you even get started. Three to four movements performed for five to 10 minutes is more than sufficient.
Below is a step-by-step pillar strength session that improves tissue quality and mobility and activates your upper and lower body. Whether you are going out for a run or getting ready to do a strength workout, this session will ensure you are ready to perform your best, while reducing your risk for injury.
Soft Tissue Work
Chest Foam Roll
Objective: To open up the chest and improve posture and movement of the upper body
Steps:
- Lie face down with a foam roller under one side of chest
- Roll along one side of upper chest
- Spend more time rolling on sore spots
- Continue for specified time; perform on opposite side
Sets/Duration: 1-2 minutes each side
Coaching Points: Place as much weight on the foam roller as you can tolerate. You can use a lacrosse ball instead of a foam roller.
Feel It: Massaging your chest
Calf Foam Roll
Objective: To improve the tissue quality of the calves and thereby improve lower body locomotion
Steps:
- Sit on ground with legs straight, one leg crossed over the other and foam roller under calf of bottom leg
- Lift butt off ground so that weight is supported by hands and foam roller
- Keeping hands still, move body back and forth, rolling lower leg over foam roller
- Spend more time rolling on sore spots
- Continue for specified time; perform on opposite side
Sets/Duration: 1-2 minutes each leg
Coaching Points: Place as much weight on the foam roller as you can tolerate
Feel It: As if you were getting a deep massage
Mobility Work
90/90 Stretch
Objective: To stretch and lengthen the chest and back in preparation for physical activity
Steps:
- Lie on side with knees bent at 90 degrees, pad pinned between knees and arms straight in front, perpendicular to torso
- Keeping pad pinned between knees, rotate chest and top arm, and try to place back on ground; exhale and hold for 2 seconds
- Reverse directions to return to start position
- Repeat for specified reps; perform on opposite side
Sets/Reps: 1×8 each side
Coaching Points: Rotate only as far as you can without lifting or separating your knees
Feel It: Stretching your torso, middle and upper back.
Straight-Leg Lowering With Support
Objective: To stretch and lengthen the hamstrings and activate the torso in preparation for physical activity
Steps:
- Lie on back with arms at sides, one leg straight against a support and the other leg straight up in air over hips
- Keeping the supported leg straight, slowly lower opposite leg to floor until slight stretch is felt; hold for 1-2 seconds
- Lower leg to return to start position
- Repeat for specified reps; perform on opposite side
Sets/Reps: 1×8 each side
Coaching Points: Keep both knees straight, toes pulled toward shins and back flat on floor
Feel It: Stretching your hamstrings and challenging your torso
Stability Work
Rolling Pattern
Objective: Once you have worked on the tissue quality and mobility of your upper and lower body, this movement helps to ensure that your pillar is engaged and primed for physical activity
Steps:
- Lie with back on ground
- Touch opposite elbow and knee
- Extend other arm straight overhead and opposite leg straight on ground
- Keeping elbow and knee together, roll body toward raised leg until lying on side
- Roll back to start position
- Repeat for specified reps; perform on opposite side
Sets/Reps: 2×8 each side with 1-2-minutes rest between sets
Coaching Points: Keep your opposite elbow and knee together throughout the movement.
Feel It: Working your torso
Learn more about Athletes’ Performance and the professional and elite athletes they support on the Athletes’ Performance page on STACK.
Photo: therunningpt.wordpress.com
RECOMMENDED FOR YOU
MOST POPULAR


The Importance of Pillar Strength
Athletes come in all forms—the professional hockey player, the runner who has an early start at the office and the high school starting pitcher, to name a few. Other than the fact that we are all human, what do we have in common? We all need pillar strength.
Pillar strength is a widely used term, but it is also widely misunderstood. Most commonly, it conjures up images and descriptions of static Front Planks and Side Planks held for time, or Crunches performed on a physioball. Pillar strength is much more than that.
What Is the Pillar?
The Pillar refers to the shoulders, torso and hips, so it is the center of all leg and arm movement. If you want to be a high-functioning athlete, you need a high-functioning pillar. A poor functioning pillar decreases your performance potential and increases your risk of injury.
For example, if I am a high school starting pitcher trying to throw a 80-mph fastball with just my arm, I limit the speed of the ball and put myself at risk for shoulder injury. If I am a runner with an early start at the office and I roll out of bed and straight onto the pavement, I limit my running potential and put myself at risk for leg and back injuries.
What Is Pillar Strength?
Pillar strength is what determines whether your pillar is high- or low-functioning. It allows you to walk, snatch, sprint and move with far less risk for injury and greater power.
How Do You Build Pillar Strength?
Pillar strength exercises are any movements aimed at improving the function of the pillar, including but not limited to: soft tissue work (foam rolling, massage sticking and trigger point therapy); mobility work (passive, active and dynamic stretching aimed at improving the range of motion of a joint and/or muscle); and stability work (movements aimed at improving the strength and activation of a muscle or joint).
The best time to do pillar strength work is at the beginning of your workout or activity. The goal is to prepare and prime the pillar for activity, while not fatiguing it before you even get started. Three to four movements performed for five to 10 minutes is more than sufficient.
Below is a step-by-step pillar strength session that improves tissue quality and mobility and activates your upper and lower body. Whether you are going out for a run or getting ready to do a strength workout, this session will ensure you are ready to perform your best, while reducing your risk for injury.
Soft Tissue Work
Chest Foam Roll
Objective: To open up the chest and improve posture and movement of the upper body
Steps:
- Lie face down with a foam roller under one side of chest
- Roll along one side of upper chest
- Spend more time rolling on sore spots
- Continue for specified time; perform on opposite side
Sets/Duration: 1-2 minutes each side
Coaching Points: Place as much weight on the foam roller as you can tolerate. You can use a lacrosse ball instead of a foam roller.
Feel It: Massaging your chest
Calf Foam Roll
Objective: To improve the tissue quality of the calves and thereby improve lower body locomotion
Steps:
- Sit on ground with legs straight, one leg crossed over the other and foam roller under calf of bottom leg
- Lift butt off ground so that weight is supported by hands and foam roller
- Keeping hands still, move body back and forth, rolling lower leg over foam roller
- Spend more time rolling on sore spots
- Continue for specified time; perform on opposite side
Sets/Duration: 1-2 minutes each leg
Coaching Points: Place as much weight on the foam roller as you can tolerate
Feel It: As if you were getting a deep massage
Mobility Work
90/90 Stretch
Objective: To stretch and lengthen the chest and back in preparation for physical activity
Steps:
- Lie on side with knees bent at 90 degrees, pad pinned between knees and arms straight in front, perpendicular to torso
- Keeping pad pinned between knees, rotate chest and top arm, and try to place back on ground; exhale and hold for 2 seconds
- Reverse directions to return to start position
- Repeat for specified reps; perform on opposite side
Sets/Reps: 1×8 each side
Coaching Points: Rotate only as far as you can without lifting or separating your knees
Feel It: Stretching your torso, middle and upper back.
Straight-Leg Lowering With Support
Objective: To stretch and lengthen the hamstrings and activate the torso in preparation for physical activity
Steps:
- Lie on back with arms at sides, one leg straight against a support and the other leg straight up in air over hips
- Keeping the supported leg straight, slowly lower opposite leg to floor until slight stretch is felt; hold for 1-2 seconds
- Lower leg to return to start position
- Repeat for specified reps; perform on opposite side
Sets/Reps: 1×8 each side
Coaching Points: Keep both knees straight, toes pulled toward shins and back flat on floor
Feel It: Stretching your hamstrings and challenging your torso
Stability Work
Rolling Pattern
Objective: Once you have worked on the tissue quality and mobility of your upper and lower body, this movement helps to ensure that your pillar is engaged and primed for physical activity
Steps:
- Lie with back on ground
- Touch opposite elbow and knee
- Extend other arm straight overhead and opposite leg straight on ground
- Keeping elbow and knee together, roll body toward raised leg until lying on side
- Roll back to start position
- Repeat for specified reps; perform on opposite side
Sets/Reps: 2×8 each side with 1-2-minutes rest between sets
Coaching Points: Keep your opposite elbow and knee together throughout the movement.
Feel It: Working your torso
Learn more about Athletes’ Performance and the professional and elite athletes they support on the Athletes’ Performance page on STACK.
Photo: therunningpt.wordpress.com