Sports Photography for Parents, Pt. 3: Two Simple Edits Make a Huge Difference
Welcome to STACK’s short series on basic sports photography for parents. In each of these quick articles, we will do our best to provide tips and advice on how youth sports parents can get great looking photos of their favorite young superstars.
In Part 1, we explained how you can take great sports photos with just your smartphone. Part 2 told you how to get in position to capture the action. Part 3 will teach you how to enhance your basic shots to look even better in the editing stage.
Crop in on the Action
If you take only one thing from this tutorial, make it this first item. No single editing technique is more valuable or important than a good crop. Check the images below to see what I mean.
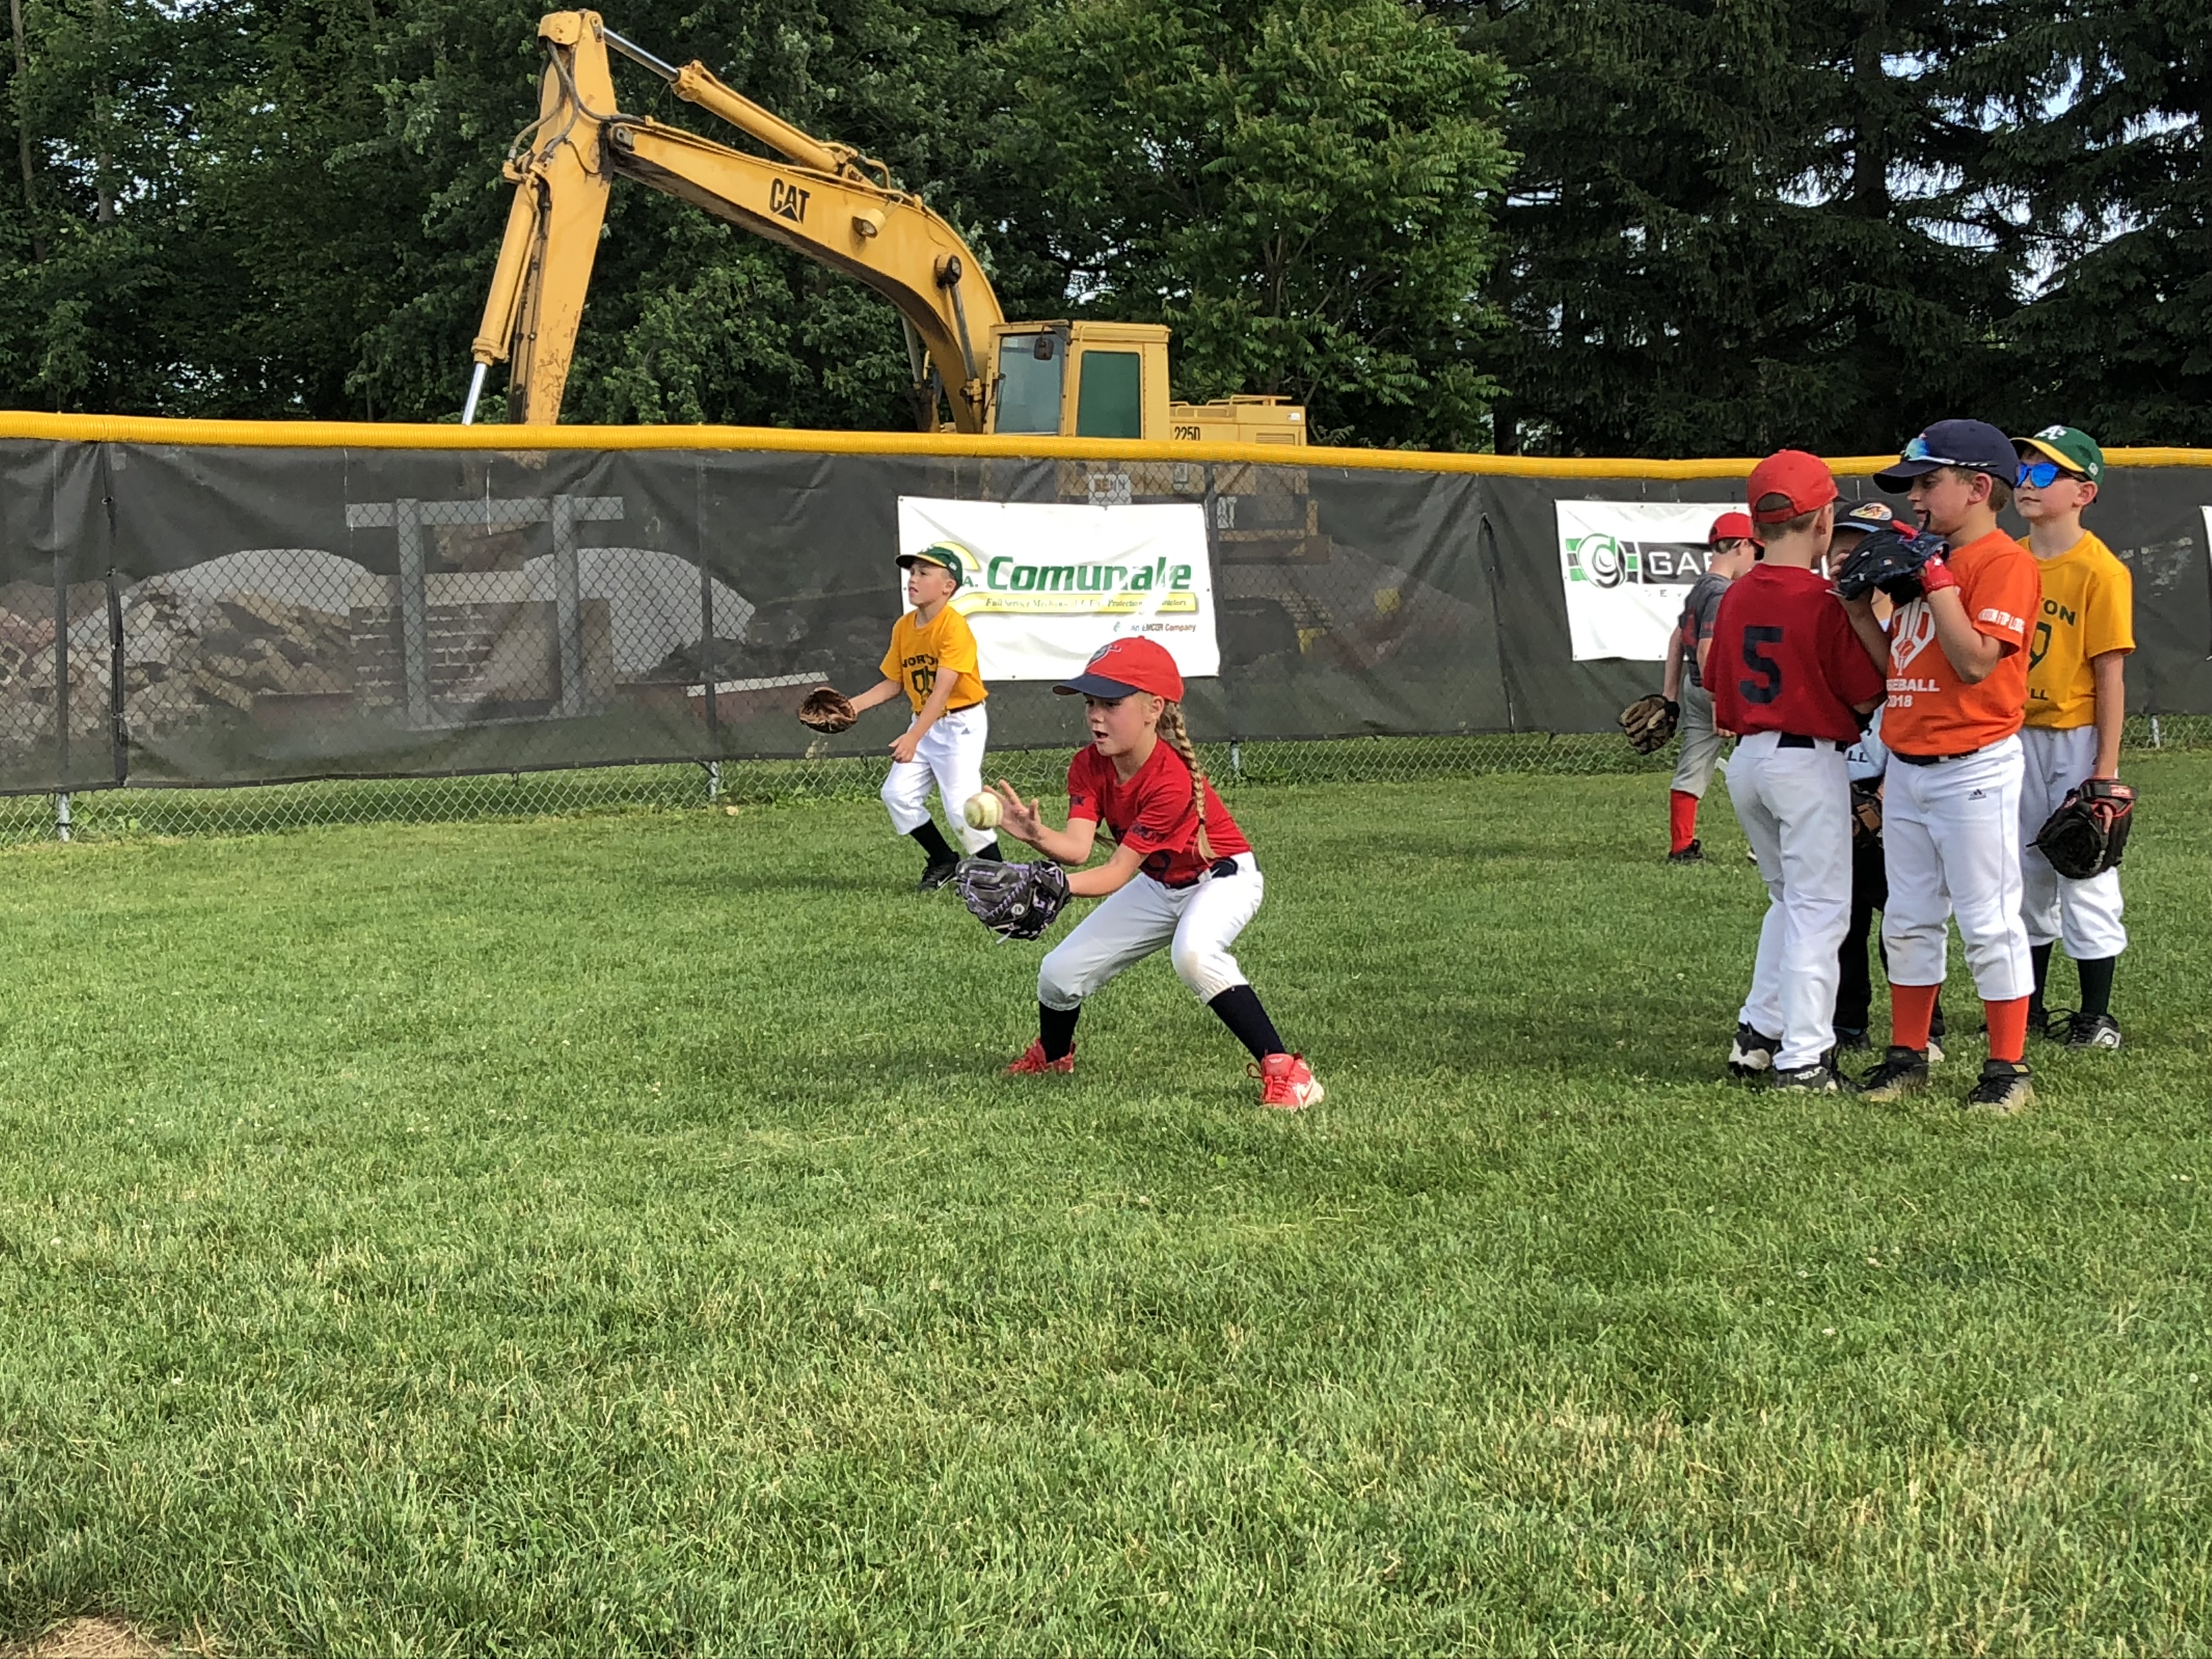
Here’s a pretty typical type of shot a parent might get with his or her smartphone. It’s not a bad shot, really, but there’s a lot going on. We want to focus on the fielder stopping that one-hopper in the center of the frame, but we’re distracted by the construction equipment in the background and the group of players chatting to the right. Not to mention that the subject is too far away. If we do nothing else but crop this photo, we will make it 100 percent better.
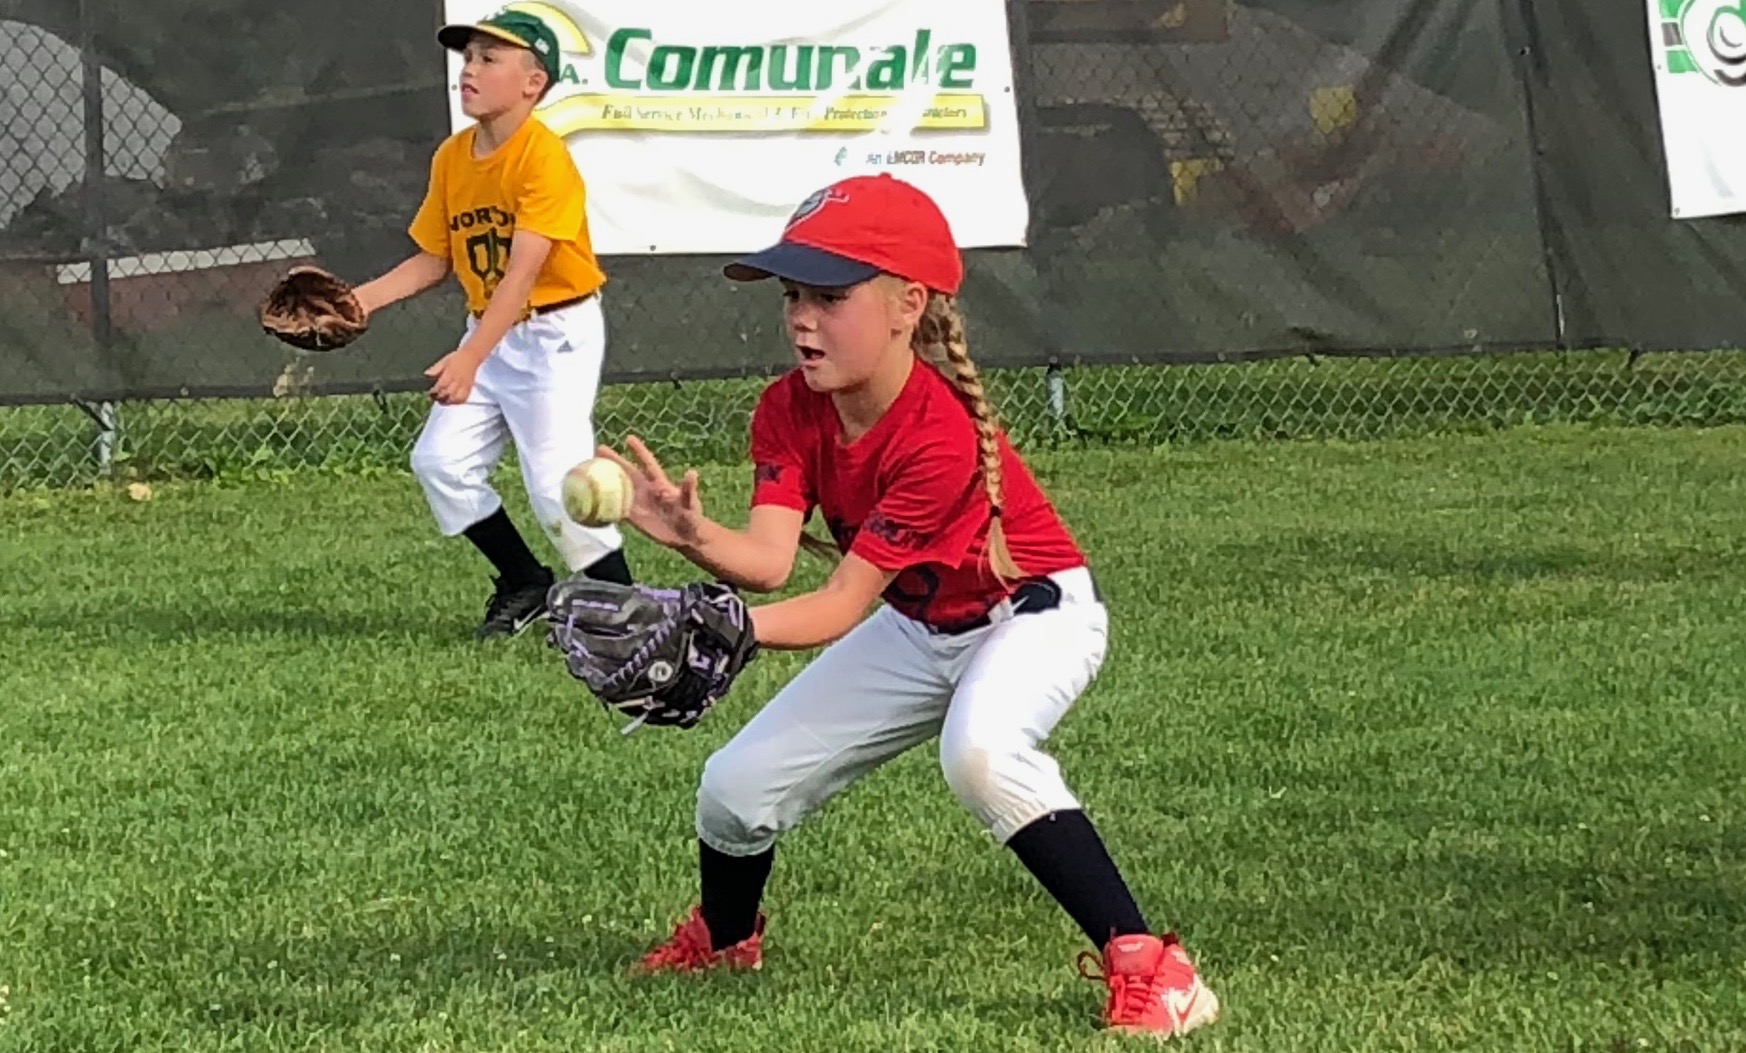
And just like that, we’ve taken a picture with a lot of confusion going on and turned it into a scrapbook-worthy shot of this young ballplayer making a play.
Rule of Thirds
Let’s take our crop a step further and apply the rule of thirds.
The rule of thirds breaks an image down into three equal size columns and rows, dividing the photo into thirds both horizontally and vertically. Many smartphones will allow you edit with grid lines showing you where the photo breaks at each third. Although we’ve almost all grown up taking pictures by centering our subject in the frame, rule of thirds makes a more dynamic and interesting image by offsetting the focal lines from the center. Check out what we’ve done with our sample photo:
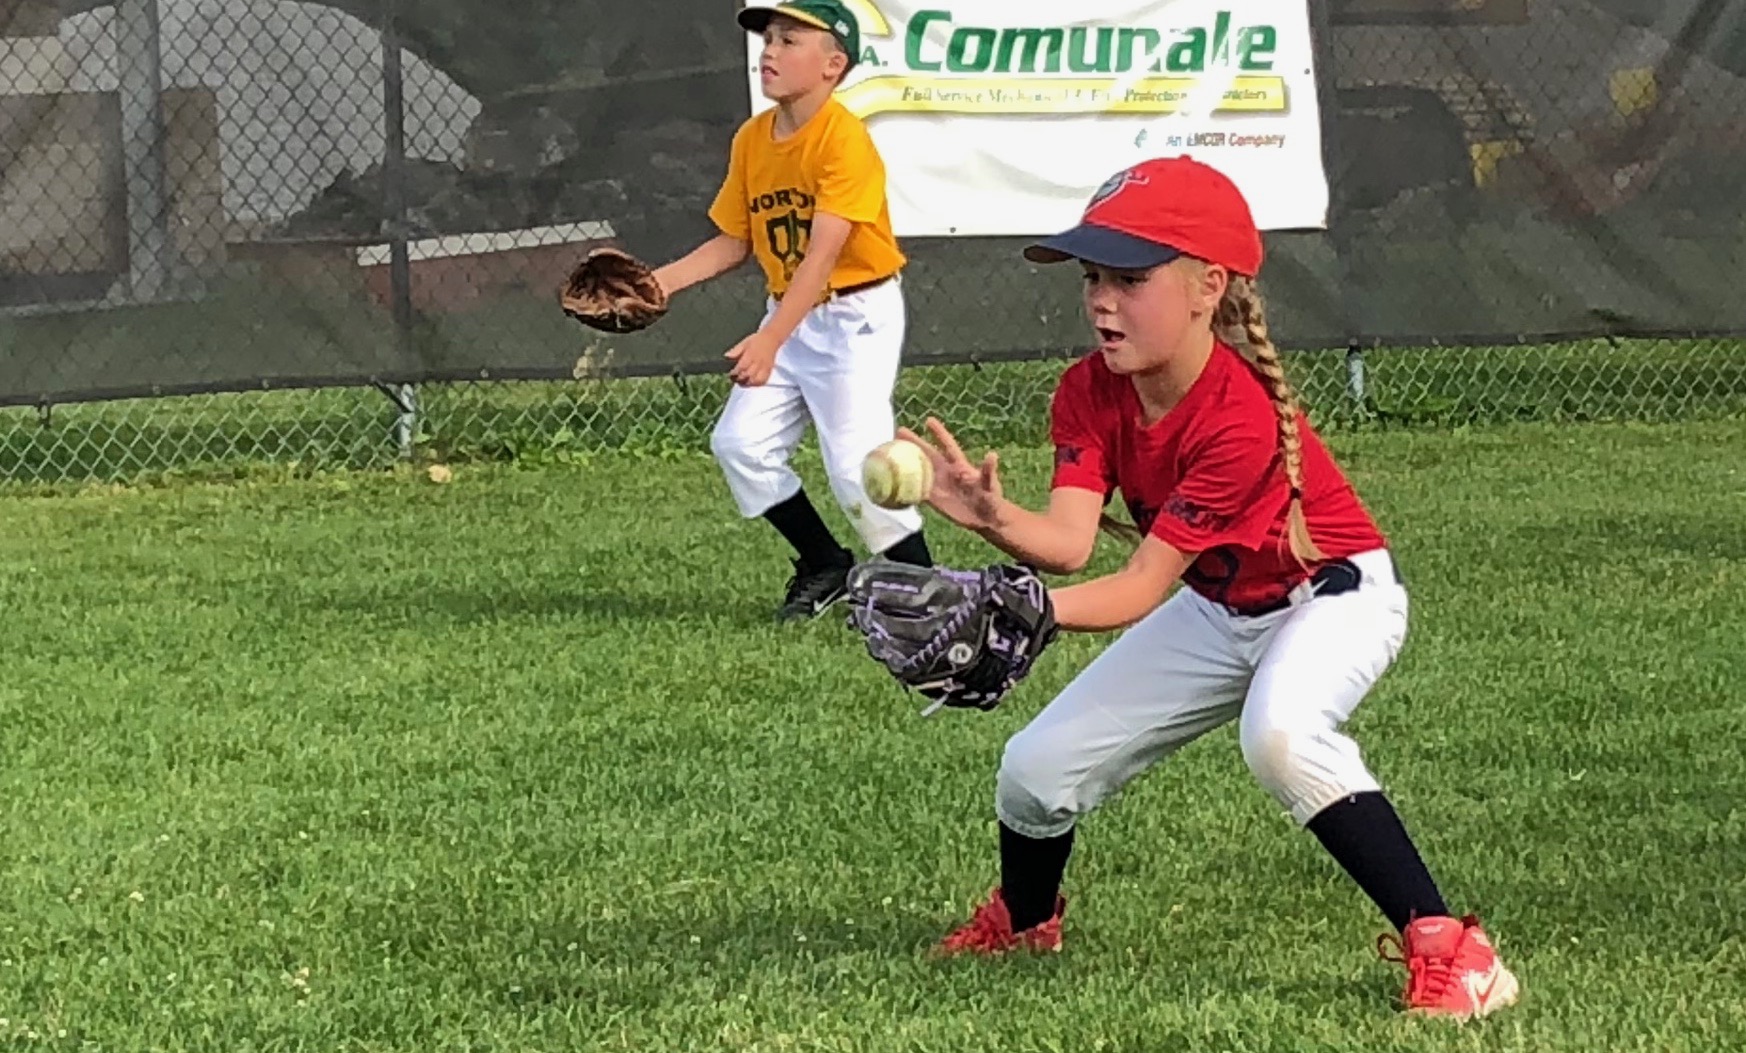
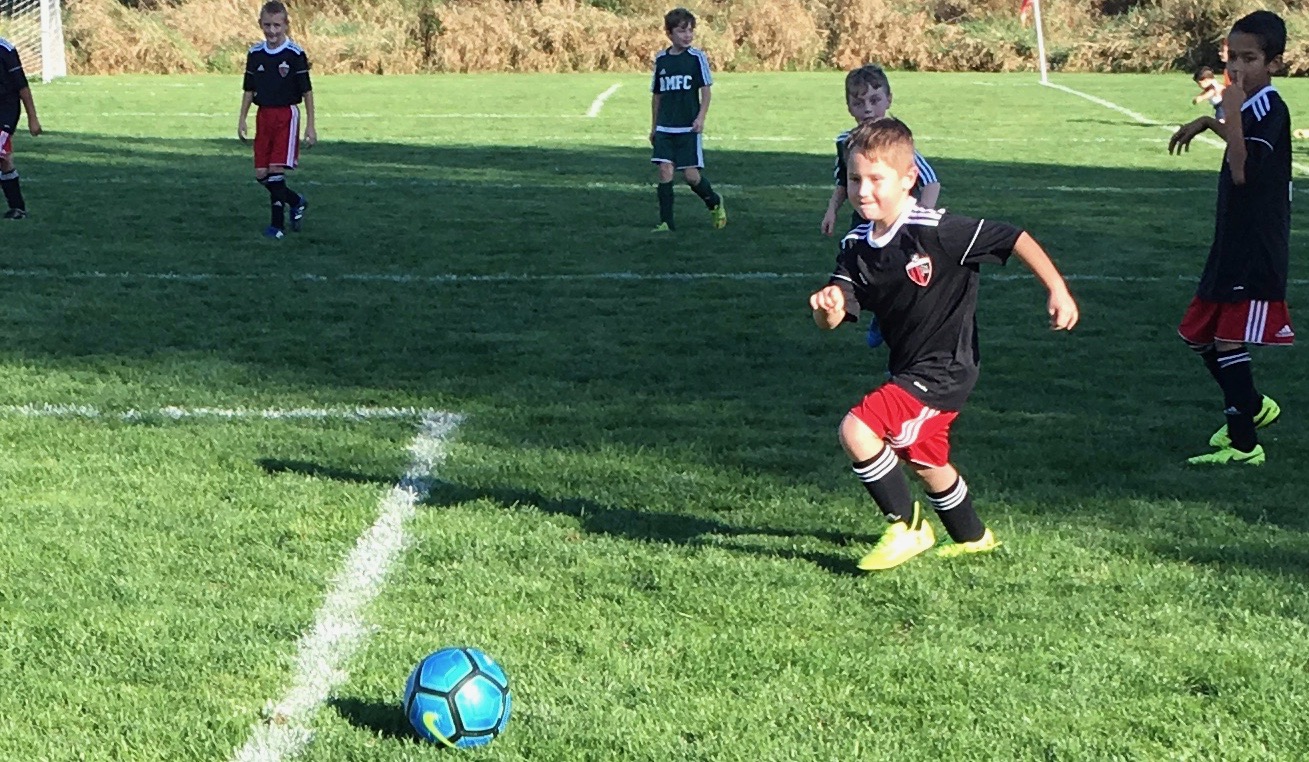
It’s a subtle difference, but by shifting our player just slightly to the right, we’ve created the sense of movement—we are drawn to her eyes and where she’s looking and where the ball came from. The other player in the background is still somewhat distracting, but arguably less so because the “lead room” draws the eye to our main subject.
It’s not an award-winning photo, but it shows what you can do with just an understanding of the basics of photo editing.
Here’s another example of making something useable out of a typically bad youth sports photo simply by cropping and applying the rule of thirds.
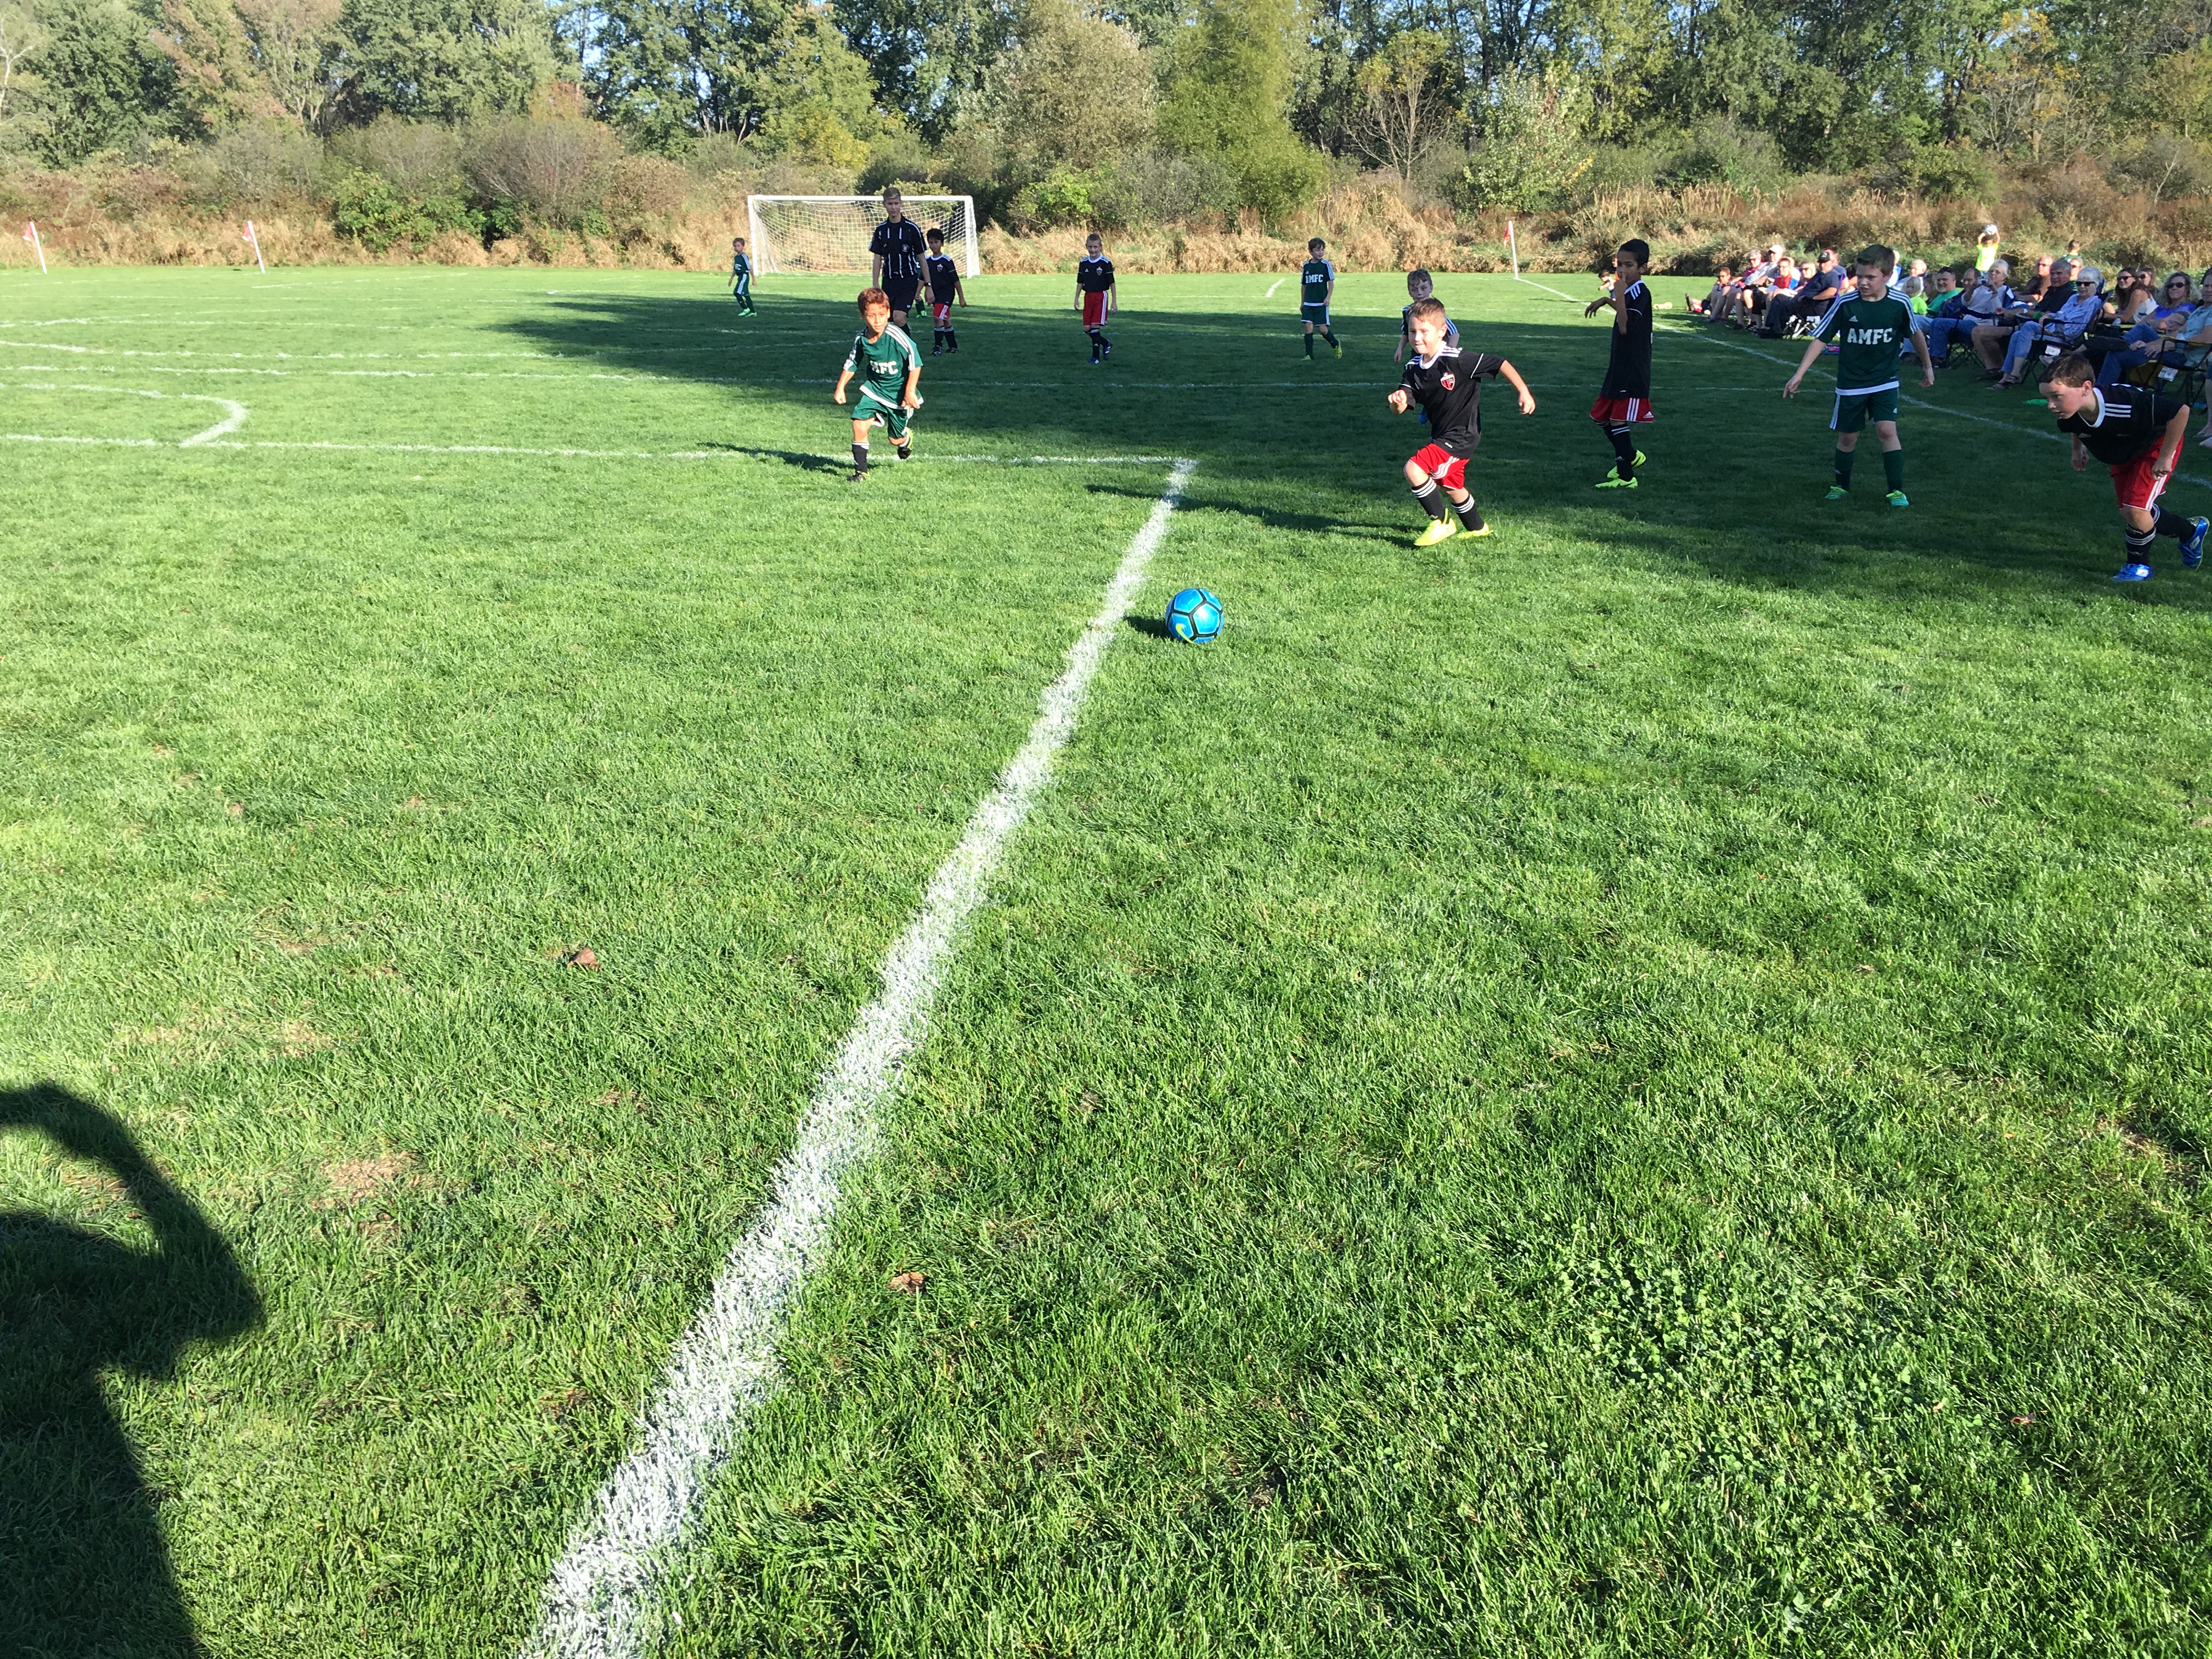
This is the poster child for “The Dad Photo.” The subjects are way far away, there’s a lot going on coupled with a ton of dead space, and look, there’s Dad’s shadow in the picture. This is just a mess. Let’s fix it with two simple techniques.
Again, we’re not going to win any awards here, but we have a photo that captures the moment and is at least somewhat interesting.
READ MORE:
RECOMMENDED FOR YOU


MOST POPULAR


Sports Photography for Parents, Pt. 3: Two Simple Edits Make a Huge Difference
Welcome to STACK’s short series on basic sports photography for parents. In each of these quick articles, we will do our best to provide tips and advice on how youth sports parents can get great looking photos of their favorite young superstars.
In Part 1, we explained how you can take great sports photos with just your smartphone. Part 2 told you how to get in position to capture the action. Part 3 will teach you how to enhance your basic shots to look even better in the editing stage.
Crop in on the Action
If you take only one thing from this tutorial, make it this first item. No single editing technique is more valuable or important than a good crop. Check the images below to see what I mean.
Here’s a pretty typical type of shot a parent might get with his or her smartphone. It’s not a bad shot, really, but there’s a lot going on. We want to focus on the fielder stopping that one-hopper in the center of the frame, but we’re distracted by the construction equipment in the background and the group of players chatting to the right. Not to mention that the subject is too far away. If we do nothing else but crop this photo, we will make it 100 percent better.
And just like that, we’ve taken a picture with a lot of confusion going on and turned it into a scrapbook-worthy shot of this young ballplayer making a play.
Rule of Thirds
Let’s take our crop a step further and apply the rule of thirds.
The rule of thirds breaks an image down into three equal size columns and rows, dividing the photo into thirds both horizontally and vertically. Many smartphones will allow you edit with grid lines showing you where the photo breaks at each third. Although we’ve almost all grown up taking pictures by centering our subject in the frame, rule of thirds makes a more dynamic and interesting image by offsetting the focal lines from the center. Check out what we’ve done with our sample photo:
It’s a subtle difference, but by shifting our player just slightly to the right, we’ve created the sense of movement—we are drawn to her eyes and where she’s looking and where the ball came from. The other player in the background is still somewhat distracting, but arguably less so because the “lead room” draws the eye to our main subject.
It’s not an award-winning photo, but it shows what you can do with just an understanding of the basics of photo editing.
Here’s another example of making something useable out of a typically bad youth sports photo simply by cropping and applying the rule of thirds.
This is the poster child for “The Dad Photo.” The subjects are way far away, there’s a lot going on coupled with a ton of dead space, and look, there’s Dad’s shadow in the picture. This is just a mess. Let’s fix it with two simple techniques.
Again, we’re not going to win any awards here, but we have a photo that captures the moment and is at least somewhat interesting.
READ MORE: