Fix Your Squat Technique With an Eight-Step Program, Part 2

If you missed last week’s post or simply need a refresher course, learn about the first leg of the Squat progression as outlined by Gabe Harrington, head strength and conditioning coach at Colgate University.
Your stance is set. You’ve learned the proper breathing technique. You’ve mastered basic Wall Squat adaptations. You have learned the first four steps of Coach Harrington’s progression for teaching proper Squat technique.
Time to get to work on the final four steps. Remember, it’s a progression, meaning you can’t advance to the next step without having mastered the previous ones. Conquer each step in sequence.
Step 5: Wall Squat
- Stand with toes against wall and arms extended at sides
- Inhale, spread floor with feet and lift big toes slightly
- Push hips back to descend into Squat
- Flex hips near bottom of movement
Coaching Points: “This is the exact form you will use with the bar on your back,” says Harrington. “You may have to practice two sets of three reps on this each day, for as long as a couple of weeks, to master it. Stay with it because it will pay you back down the road.”

An athlete practices performing a Wall Squat.
- Assume correct Squat position with empty barbell resting across front of shoulders
- Extend arms straight out with thumbs up toward ceiling at eye level
- Inhale, spread floor with feet, lift big toes slightly and push hips back to descend into Squat
Coaching Points: “If the bar rolls off your shoulder, you are falling forward,” Harrington says. “Once you can do this for a set of two to three reps, you are ready to Back Squat.”

An athlete performs a Modified Front Squat.
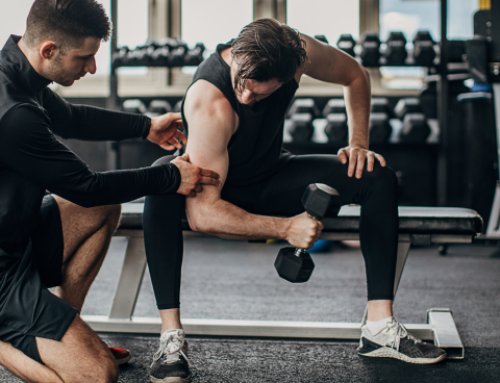
Step 7: Holding Barbell on Your Back
- Squeeze shoulder blades together, creating a natural shelf with your traps and rear delts for the bar to rest on
- Grip bar firmly, keep eyes up and push head back into bar
Coaching Points: Harrington: “Your wrists and upper back may not be strong enough initially to support much weight in this fashion, but stick with it. Your upper back will grow thick with muscle from supporting weight in this manner, not to mention this is the most advantageous way to hold the bar.”

An athlete shows the correct barbell position.
- Perform practice sets with no more than two reps at a time using light weight
- Inhale, spread floor with feet, lift big toes slightly and push hips back to descend into Squat
- Drive through heels to explode up from Squat
Coaching Points: Hold head back // Maintain good spinal arch // Says Harrington: “At this point, having mastered the previous progressions, the Back Squat should be a breeze. Add weight slowly, and in time you will have a healthy and impressive physique from all of your hard work.”
Source: rogersathletic.com
Photo: Danny Vega [Top]
RECOMMENDED FOR YOU


MOST POPULAR


Fix Your Squat Technique With an Eight-Step Program, Part 2
If you missed last week’s post or simply need a refresher course, learn about the first leg of the Squat progression as outlined by Gabe Harrington, head strength and conditioning coach at Colgate University.
Your stance is set. You’ve learned the proper breathing technique. You’ve mastered basic Wall Squat adaptations. You have learned the first four steps of Coach Harrington’s progression for teaching proper Squat technique.
Time to get to work on the final four steps. Remember, it’s a progression, meaning you can’t advance to the next step without having mastered the previous ones. Conquer each step in sequence.
Step 5: Wall Squat
- Stand with toes against wall and arms extended at sides
- Inhale, spread floor with feet and lift big toes slightly
- Push hips back to descend into Squat
- Flex hips near bottom of movement
Coaching Points: “This is the exact form you will use with the bar on your back,” says Harrington. “You may have to practice two sets of three reps on this each day, for as long as a couple of weeks, to master it. Stay with it because it will pay you back down the road.”
An athlete practices performing a Wall Squat.
- Assume correct Squat position with empty barbell resting across front of shoulders
- Extend arms straight out with thumbs up toward ceiling at eye level
- Inhale, spread floor with feet, lift big toes slightly and push hips back to descend into Squat
Coaching Points: “If the bar rolls off your shoulder, you are falling forward,” Harrington says. “Once you can do this for a set of two to three reps, you are ready to Back Squat.”
An athlete performs a Modified Front Squat.
Step 7: Holding Barbell on Your Back
- Squeeze shoulder blades together, creating a natural shelf with your traps and rear delts for the bar to rest on
- Grip bar firmly, keep eyes up and push head back into bar
Coaching Points: Harrington: “Your wrists and upper back may not be strong enough initially to support much weight in this fashion, but stick with it. Your upper back will grow thick with muscle from supporting weight in this manner, not to mention this is the most advantageous way to hold the bar.”
An athlete shows the correct barbell position.
- Perform practice sets with no more than two reps at a time using light weight
- Inhale, spread floor with feet, lift big toes slightly and push hips back to descend into Squat
- Drive through heels to explode up from Squat
Coaching Points: Hold head back // Maintain good spinal arch // Says Harrington: “At this point, having mastered the previous progressions, the Back Squat should be a breeze. Add weight slowly, and in time you will have a healthy and impressive physique from all of your hard work.”
Source: rogersathletic.com
Photo: Danny Vega [Top]