Eight “Steps” to Return to Action After a Sprained Ankle
It’s a nightmare situation: a star player laid out during a game clutching his ankle. Debilitating ankle injuries are serious in sports, from the basic sprain to a major grade 3 sprain that causes joint instability, throbbing pain, swelling and bruising from a probable torn ligament. Any of these symptoms can sideline an athlete indefinitely. (See A 3-Part Strategy for Preventing Ankle Injuries.)
When you or a teammate missteps and twists an ankle, follow these “steps” as soon as possible to resume walking and eventually running normally sooner rather than later.
Step 1: Apply Ice
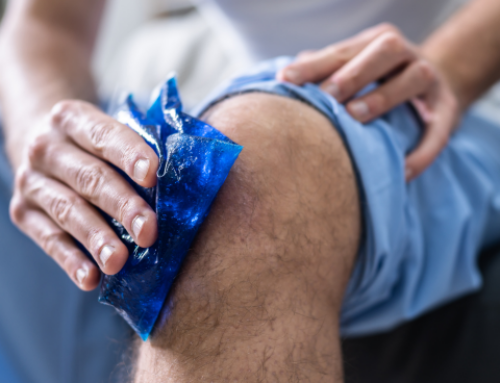
As with other sprains and strains, first stabilize the area—i.e., rest it with no movement and no weight-bearing pressure—then immediately apply ice to decrease inflammation and minimize soreness. The general standard is to elevate a sprained ankle and regularly apply ice packs (10 minutes on and off) during the first 48 hours after injury with approximately six to 10 ice applications. (See Recover Faster: Simple Cold Therapy Techniques.)
Another option: Soak the sprained ankle in cold water 10 minutes on and off.
Step 2: Employ Mood-Boosting Dynamic Rest on Non-Consecutive Days
I don’t have to tell you how much of a downer a sprained ankle is. But allowing yourself to wallow in despair during the rehab process is a poor choice. So, while you’re sitting around, passively rest the injured area. With the ankle elevated, have a teammate hand you a moderately heavy (e.g., 8- to 12-pound) medicine ball for upper body exercises, and use the dynamic rest protocol. Exercising and staying active are perfect uplifting remedies to maintain your conditioning and prevent upper-body atrophy during the recovery period.
Try this workout:
To strengthen shoulder, triceps and pectoral muscles, do three sets of 10 reps of Overhead Presses, Press-Outs from chest level and Ball Raises. Rest only 30 seconds between sets to add intensity, improve endurance and enhance those powerful feel-good endorphins, which will help you temporarily forget your injury
Step 3: Swim
Swimming is an excellent non-weight-bearing dynamic rest activity you can do without harming your sprained ankle during the first few days of rehabilitation.
Step 4: Exercise the Healthy Leg
This ultimately depends on the nature of the sprain, because your athletic trainer or physician may have suggested crutches, and you’re not stationary all day. However, if you can get to a leg press machine in the weight room, maintain your lower-body fitness by doing three sets of 10 Single-Leg Presses (at 80% RM) with the healthy foot. Not only will this strengthen your quads, hamstrings and hips, it will also deter the non-exercising injured limb from atrophying (under a principle known as cross-transference by exercising a healthy limb while the injured limb heals).
An athlete with a grade 1 or 2 ankle sprain may even be able to do three sets of 10 Single-Leg Bodyweight Squats on the healthy leg—or Isometric Squats (i.e., staying in squat position on the non-injured leg for 30 to 60 seconds), holding firmly to a countertop or placing hands against a wall for support while holding the injured ankle off the ground.
Step 5: Perform Seated Up and Down Ankle Range of Motion Exercise
With a minor sprain, while seated try slowly moving the injured foot up toward you (dorsiflexion) and then down (plantar flexion) to promote circulation and help restore range of motion. Avoid lateral rotation so as not to inflame the ligaments. Do this for three sets of five reps.
Step 6: Ride the Stationary Bike
After the ice treatment phase, and in addition to upper-body and single-leg lower-body dynamic rest exercises and the gentle range of motion exercise, medical professionals may advise riding a stationary bike (with the resistance level set low) to test the ankle with a non-weight-bearing exercise. If there is little discomfort, the resistance setting may be increased.
Step 7: Walk
Perhaps the most difficult “step” of the rehab period, especially from a mental standpoint, is testing the ankle by taking those first weight-bearing steps after days or perhaps weeks of treatment. Think of it as learning to walk all over again. If you’ve consistently adhered to the above treatment regimen (i.e., ice applications, passive and dynamic rest, gentle range of motion exercise), the ankle should respond well to gradual walking.
Step 8: Walk Briskly, then Jog
Pain-free brisk walking and then eventually painless jogging may be the last “steps” before you are finally cleared to return to action.
RECOMMENDED FOR YOU
MOST POPULAR
Eight “Steps” to Return to Action After a Sprained Ankle
It’s a nightmare situation: a star player laid out during a game clutching his ankle. Debilitating ankle injuries are serious in sports, from the basic sprain to a major grade 3 sprain that causes joint instability, throbbing pain, swelling and bruising from a probable torn ligament. Any of these symptoms can sideline an athlete indefinitely. (See A 3-Part Strategy for Preventing Ankle Injuries.)
When you or a teammate missteps and twists an ankle, follow these “steps” as soon as possible to resume walking and eventually running normally sooner rather than later.
Step 1: Apply Ice
As with other sprains and strains, first stabilize the area—i.e., rest it with no movement and no weight-bearing pressure—then immediately apply ice to decrease inflammation and minimize soreness. The general standard is to elevate a sprained ankle and regularly apply ice packs (10 minutes on and off) during the first 48 hours after injury with approximately six to 10 ice applications. (See Recover Faster: Simple Cold Therapy Techniques.)
Another option: Soak the sprained ankle in cold water 10 minutes on and off.
Step 2: Employ Mood-Boosting Dynamic Rest on Non-Consecutive Days
I don’t have to tell you how much of a downer a sprained ankle is. But allowing yourself to wallow in despair during the rehab process is a poor choice. So, while you’re sitting around, passively rest the injured area. With the ankle elevated, have a teammate hand you a moderately heavy (e.g., 8- to 12-pound) medicine ball for upper body exercises, and use the dynamic rest protocol. Exercising and staying active are perfect uplifting remedies to maintain your conditioning and prevent upper-body atrophy during the recovery period.
Try this workout:
To strengthen shoulder, triceps and pectoral muscles, do three sets of 10 reps of Overhead Presses, Press-Outs from chest level and Ball Raises. Rest only 30 seconds between sets to add intensity, improve endurance and enhance those powerful feel-good endorphins, which will help you temporarily forget your injury
Step 3: Swim
Swimming is an excellent non-weight-bearing dynamic rest activity you can do without harming your sprained ankle during the first few days of rehabilitation.
Step 4: Exercise the Healthy Leg
This ultimately depends on the nature of the sprain, because your athletic trainer or physician may have suggested crutches, and you’re not stationary all day. However, if you can get to a leg press machine in the weight room, maintain your lower-body fitness by doing three sets of 10 Single-Leg Presses (at 80% RM) with the healthy foot. Not only will this strengthen your quads, hamstrings and hips, it will also deter the non-exercising injured limb from atrophying (under a principle known as cross-transference by exercising a healthy limb while the injured limb heals).
An athlete with a grade 1 or 2 ankle sprain may even be able to do three sets of 10 Single-Leg Bodyweight Squats on the healthy leg—or Isometric Squats (i.e., staying in squat position on the non-injured leg for 30 to 60 seconds), holding firmly to a countertop or placing hands against a wall for support while holding the injured ankle off the ground.
Step 5: Perform Seated Up and Down Ankle Range of Motion Exercise
With a minor sprain, while seated try slowly moving the injured foot up toward you (dorsiflexion) and then down (plantar flexion) to promote circulation and help restore range of motion. Avoid lateral rotation so as not to inflame the ligaments. Do this for three sets of five reps.
Step 6: Ride the Stationary Bike
After the ice treatment phase, and in addition to upper-body and single-leg lower-body dynamic rest exercises and the gentle range of motion exercise, medical professionals may advise riding a stationary bike (with the resistance level set low) to test the ankle with a non-weight-bearing exercise. If there is little discomfort, the resistance setting may be increased.
Step 7: Walk
Perhaps the most difficult “step” of the rehab period, especially from a mental standpoint, is testing the ankle by taking those first weight-bearing steps after days or perhaps weeks of treatment. Think of it as learning to walk all over again. If you’ve consistently adhered to the above treatment regimen (i.e., ice applications, passive and dynamic rest, gentle range of motion exercise), the ankle should respond well to gradual walking.
Step 8: Walk Briskly, then Jog
Pain-free brisk walking and then eventually painless jogging may be the last “steps” before you are finally cleared to return to action.


