Push Your Off-Season Basketball Conditioning to the Next Level

Basketball players, coaches and fans regularly disagree on what makes an athlete “a clutch player.” Is it when they regularly score the game-winning basket, set up momentum-changing plays or consistently play hard-press defense against the opponent? (Here are 8 Ways to Become a Better Basketball Player.)
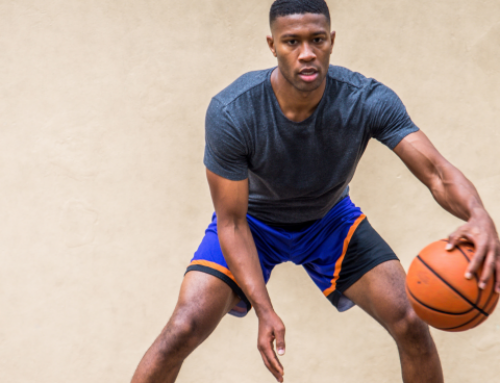
As a player, you can’t control outsiders’ opinions, but you can control your level of conditioning. On an individual level, it’s the most important thing you can do for yourself to improve.
During a game, athletes need to read and react quickly as they move precisely and under control in many directions. Conditioning for basketball needs to mimic those conditions and movements. (Get some tips from Maryland’s Women’s Basketball Conditioning.)
The following drills will work on your speed, agility and anaerobic endurance to condition for game-changing performances no one can argue with.
Basketball Conditioning Workout Elements
The first step is to prepare your body for a workout with a functional dynamic warm-up, including core stability exercises. This will help prevent injury. Depending on where you are in the season, it can also be advantageous to include speed development and foot speed drills.
Functional Dynamic Warm-Up
A Dynamic Warm-Up is designed to stimulate neural activation and get muscles and joints ready for physical activity. Always perform a general low impact warm-up to increase blood flow, joint fluid movement and heart rate.
[youtube video=”gAK29f4LijQ” /]Reaction Drills
Additional reaction drills are great to improve hand/eye coordination for basketball movements.
Core Stability
A strong core supports and stabilizes the midsection of the body, allowing for a faster and more powerful motion during transitions. Core training is also crucial for injury prevention, balance, posture, base of power and proper energy transfer. Core drills can be done with a basketball or a medicine ball.
[youtube video=”bauzLZl-Wbo” /]Conditioning
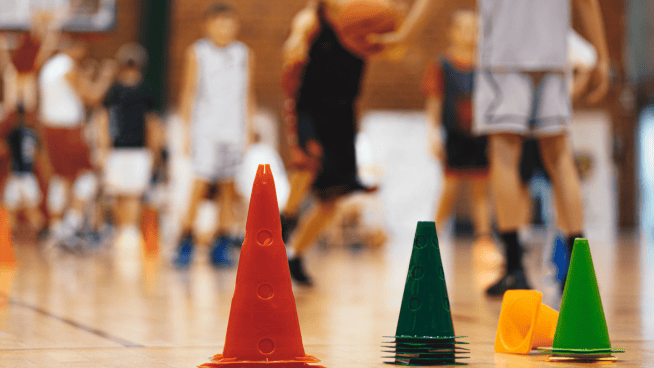
The following off-season conditioning drills can be done on a surface other than a basketball court. Remember to push yourself past your comfort zone. The only way to take the next step and get better is to work through physical fatigue and mental barriers. Working hard is not natural but a characteristic that must be learned and developed. Hard work is a choice that everyone must make to maximize their potential.
Box Drills

General Set-Up: Space agility cones five yards apart to resemble the above diagram.
Sets/Reps: Choose four of the following eight drills and perform 2 to 3 sets.
Notes: Perform each drill at a fast pace that allows you to also work on your balance and body control on each cut. Also make sure to emphasize pushing off your outside leg when changing direction and dropping your hip level. To add complexity, touch each cone with your hand when cutting out of sprints.
Drill 1 :
- Sprint around cones in numerical order (1,2,3,4)
- Cut tightly around each cone
Drill 2:
- Beginning at cone 1, sprint to cone 2
- Backpedal to cone 3
- Sprint forward to cone 4
Drill 3:
- Get into an athletic position at cone 1
- Begin a defensive slide toward cone 2
- Sprint to cone 3
- Drop back into your athletic position and begin a defensive slide toward cone 4
Drill 4:
- Sprint from cone 1 to cone 2
- Diagonally sprint to cone 4
- Sprint from cone 4 to cone 3
Drill 5:
- Get into an athletic position at cone 1
- Begin a defensive slide to cone 2
- Sprint to cone 3
- Drop back into your athletic position and begin a defensive slide toward cone 1
Drill 6:
- Sprint from cone 1 to cone 4
- Spring diagonally from cone 4 to cone 2
- Carioca from cone 2 to cone 3
- Sprint diagonally from cone 3 to cone 1
Drill 7:
- Sprint diagonally from cone 1 to cone 3
- Sprint sideways from cone 3 to cone 4
- Backpedal from cone 4 to cone 2
- Drop into athletic position and defensive-slide cone 2 to cone 1
Drill 8:
- Sprint from cone 1 to cone 2
- Backpedal from cone 2 to cone 1
- Sprint cone 3
- Drop into athletic position and defensive-slide from cone 3 to cone 4
Partner Medicine Ball Toss in Paint

Set Up:
The team stands at half court. One player stands at the top of the key holding a med ball and will make three passes to the player performing the drill. The athlete tossing the med ball will replace the player in the drill after they complete three passes.
Drill:
- From the top of the key, sprint to the baseline, change direction and sprint to the left side of the free throw line
- Catch a pass from the player with the med ball, and immediately return the pass
- Sprint back to the baseline, change direction and sprint to the center of the free throw line
- Complete another pass
- Sprint back to the baseline, change direction and sprint to the right side of the free throw line
- Complete another pass, and backpedal to the baseline
- Shuffle toward the 3-point line and sprint around trying to beat the first pass made to the next player in line
Form Slide Drill (Defensive)

Sets/Reps: 3 to 5 sets at a slow recovery pace to condition your legs to cover the length of court. During these sets, focus on mastering your mechanics. Then perform 3-5 more sets at top speed, continuing to emphasize your posture.
Movement Pattern:
- Face the baseline in defensive stance
- Perform 3 defensive slide steps at a 45-degree angle to your right
- Keep your hands out wide and active
- After completion of 3 steps, pivot to a 45-degree angle going to your left (during the pivot, make sure to keep your hips open)
- Take 3 more steps
- Repeat pattern down the length of the court
Note: Always emphasize keeping your hips down, chest up and having your weight balanced. Your feet should not touch during the drill.
Beat the Clock

Set-Up: Place the cones in a 2-foot perimeter around the key, as shown in the above diagram.
Movement Pattern:
- Start in the center of the key at cone a
- Slide toward cone b
- Slide back toward cone a
- Slide to cone c
- Slide back to cone a
- Sprint to cone c
- Slide back to cone a
- Sprint to cone d
- Slide back to cone a
- Slide to cone e
- Slide back to cone a
- Repeat same movement pattern through cones e, f and g.
Getting in the Zone

Set-Up: During this 3 Zone series, athletes move through cones performing various agility and skill movements. The prescribed drill (e.g., High Knee Run) is performed in the activity zone. Once you hit the recovery zone, jog slowly for 30 seconds to four minutes depending on your conditioning level. (See below chart for more clarification.)

Sets/Reps: Start with 2 trips through one series, and work up to as many as four or five trips.
Series:
- Sprint
- High Knees
- Sprint
- Defensive Shuffles
- Sprint
- Backpedal
- Sprint
L-Agility Drill
 Movement Pattern:
- Start on right side of the key at the baseline
- Sprint to and touch cone A
- Backpedal to the baseline
- Sprint back to cone A
- Drop into athletic position and defensive-slide to cone B
- Touch cone B with your left hand, reverse the motion and backpedal to start
Note: perform the entire drill at full speed.
Figure 8 Conditioning Drill

Set-up: Place 5 cones as follows:
- At the free throw line
- Between the free throw line and half court
- Half court
- Between half court and the opposite free throw line
- Opposite free throw line
Movement Pattern:
- Sprint from the right side of cone 1 to the left side of cone 5
- Circle around cone 5, staying low
- Sprint back to and around cone 1
- Continue sprinting in figure 8 pattern for 30 seconds
Zig-Zag Drill
 Movement Pattern:
- Start on right side of the key at the baseline
- Navigate through A-B-C-D with any movement pattern specific to basketball (e.g., defensive slide, sprint, backpedal)
- Sprint from D to the backboard, jump and touch the backboard
Sample Drill
- Defensive-slide facing center court to A
- Sprint to B
- Defensive-slide facing center court to C
- Sprint to D and cut hard
- Sprint to and touch backboard
Super Zig Zag

Movement Pattern:
- Start on right side of the key at the baseline
- Navigate through A-B-C-D-E-F-G. Finish with any movement pattern specific to basketball (e.g. defensive-slide, sprint, backpedal)
Sample Drill:
- Defensive-slide through drill as fast as you can.
Little W Drill

Sets/Reps: Perform from both sides with 4-6 sets of varying movements (e.g. defensive slides, sprints, backpedals, carioca
Sample Movement Pattern:
- Start on the left wing facing the baseline
- Sprint from cone A to cone B, lower your inside hand
- Sprint from cone B to cone C, again putting your inside hand down
- Sprint from cone C to cone D, putting your inside hand down
- Final sprint from D to cone E
Note: You can make this drill more sport-specific by incorporating a basketball.
T-Drill

- Sprint from cone 1 to cone 2
- Drop into athletic position and defensive-slide from cone 2 to cone 3
- Defensive-slide from cone 3 to cone 4
- Defensive slide from cone 4 to cone 2
- Backpedal from cone 2 to cone 2
Super T-Drill

- Sprint from cone 1 to cone 5
- Jog from cone 5 to cone 2
- Sprint from cone 2 to cone 3
- Sprint to cone 4
- Jog back to cone 1
- Sprint to cone 2
- Sprint to cone 5
- Raise hands sprint to cone 3
- Jog cone 4
- Sprint back to cone 1
- Sprint back to cone 4
- Sprint to cone 5
- Raise hands and sprint to cone 3
- Jog to cone 4
- Sprint back to cone 1
- Sprint to cone 3 and perform a Vertical Jump
- Backpedal to cone 2
- Sprint to cone 1
- Sprint to cone 3 and perform a Vertical Jump
- Backpedal to cone 2
- Sprint to cone 4
- Sprint to cone 1
- Sprint cone 5
- Carioca to cone 2
- Sprint to cone 3
- Sprint to cone 5
- Backpedal to cone 1
- Sprint to cone 5
- Carioca to cone 4
- Sprint to cone 3
- Sprint to cone 5
- Backpedal to cone 1
RECOMMENDED FOR YOU


MOST POPULAR


Push Your Off-Season Basketball Conditioning to the Next Level
Basketball players, coaches and fans regularly disagree on what makes an athlete “a clutch player.” Is it when they regularly score the game-winning basket, set up momentum-changing plays or consistently play hard-press defense against the opponent? (Here are 8 Ways to Become a Better Basketball Player.)
As a player, you can’t control outsiders’ opinions, but you can control your level of conditioning. On an individual level, it’s the most important thing you can do for yourself to improve.
During a game, athletes need to read and react quickly as they move precisely and under control in many directions. Conditioning for basketball needs to mimic those conditions and movements. (Get some tips from Maryland’s Women’s Basketball Conditioning.)
The following drills will work on your speed, agility and anaerobic endurance to condition for game-changing performances no one can argue with.
Basketball Conditioning Workout Elements
The first step is to prepare your body for a workout with a functional dynamic warm-up, including core stability exercises. This will help prevent injury. Depending on where you are in the season, it can also be advantageous to include speed development and foot speed drills.
Functional Dynamic Warm-Up
A Dynamic Warm-Up is designed to stimulate neural activation and get muscles and joints ready for physical activity. Always perform a general low impact warm-up to increase blood flow, joint fluid movement and heart rate.
Reaction Drills
Additional reaction drills are great to improve hand/eye coordination for basketball movements.
[youtube video=”6niYRZ1b4QA” /]Core Stability
A strong core supports and stabilizes the midsection of the body, allowing for a faster and more powerful motion during transitions. Core training is also crucial for injury prevention, balance, posture, base of power and proper energy transfer. Core drills can be done with a basketball or a medicine ball.
[youtube video=”bauzLZl-Wbo” /]Conditioning
The following off-season conditioning drills can be done on a surface other than a basketball court. Remember to push yourself past your comfort zone. The only way to take the next step and get better is to work through physical fatigue and mental barriers. Working hard is not natural but a characteristic that must be learned and developed. Hard work is a choice that everyone must make to maximize their potential.
Box Drills
General Set-Up: Space agility cones five yards apart to resemble the above diagram.
Sets/Reps: Choose four of the following eight drills and perform 2 to 3 sets.
Notes: Perform each drill at a fast pace that allows you to also work on your balance and body control on each cut. Also make sure to emphasize pushing off your outside leg when changing direction and dropping your hip level. To add complexity, touch each cone with your hand when cutting out of sprints.
Drill 1 :
- Sprint around cones in numerical order (1,2,3,4)
- Cut tightly around each cone
Drill 2:
- Beginning at cone 1, sprint to cone 2
- Backpedal to cone 3
- Sprint forward to cone 4
Drill 3:
- Get into an athletic position at cone 1
- Begin a defensive slide toward cone 2
- Sprint to cone 3
- Drop back into your athletic position and begin a defensive slide toward cone 4
Drill 4:
- Sprint from cone 1 to cone 2
- Diagonally sprint to cone 4
- Sprint from cone 4 to cone 3
Drill 5:
- Get into an athletic position at cone 1
- Begin a defensive slide to cone 2
- Sprint to cone 3
- Drop back into your athletic position and begin a defensive slide toward cone 1
Drill 6:
- Sprint from cone 1 to cone 4
- Spring diagonally from cone 4 to cone 2
- Carioca from cone 2 to cone 3
- Sprint diagonally from cone 3 to cone 1
Drill 7:
- Sprint diagonally from cone 1 to cone 3
- Sprint sideways from cone 3 to cone 4
- Backpedal from cone 4 to cone 2
- Drop into athletic position and defensive-slide cone 2 to cone 1
Drill 8:
- Sprint from cone 1 to cone 2
- Backpedal from cone 2 to cone 1
- Sprint cone 3
- Drop into athletic position and defensive-slide from cone 3 to cone 4
Partner Medicine Ball Toss in Paint
Set Up:
The team stands at half court. One player stands at the top of the key holding a med ball and will make three passes to the player performing the drill. The athlete tossing the med ball will replace the player in the drill after they complete three passes.
Drill:
- From the top of the key, sprint to the baseline, change direction and sprint to the left side of the free throw line
- Catch a pass from the player with the med ball, and immediately return the pass
- Sprint back to the baseline, change direction and sprint to the center of the free throw line
- Complete another pass
- Sprint back to the baseline, change direction and sprint to the right side of the free throw line
- Complete another pass, and backpedal to the baseline
- Shuffle toward the 3-point line and sprint around trying to beat the first pass made to the next player in line
Form Slide Drill (Defensive)
Sets/Reps: 3 to 5 sets at a slow recovery pace to condition your legs to cover the length of court. During these sets, focus on mastering your mechanics. Then perform 3-5 more sets at top speed, continuing to emphasize your posture.
Movement Pattern:
- Face the baseline in defensive stance
- Perform 3 defensive slide steps at a 45-degree angle to your right
- Keep your hands out wide and active
- After completion of 3 steps, pivot to a 45-degree angle going to your left (during the pivot, make sure to keep your hips open)
- Take 3 more steps
- Repeat pattern down the length of the court
Note: Always emphasize keeping your hips down, chest up and having your weight balanced. Your feet should not touch during the drill.
Beat the Clock
Set-Up: Place the cones in a 2-foot perimeter around the key, as shown in the above diagram.
Movement Pattern:
- Start in the center of the key at cone a
- Slide toward cone b
- Slide back toward cone a
- Slide to cone c
- Slide back to cone a
- Sprint to cone c
- Slide back to cone a
- Sprint to cone d
- Slide back to cone a
- Slide to cone e
- Slide back to cone a
- Repeat same movement pattern through cones e, f and g.
Getting in the Zone
Set-Up: During this 3 Zone series, athletes move through cones performing various agility and skill movements. The prescribed drill (e.g., High Knee Run) is performed in the activity zone. Once you hit the recovery zone, jog slowly for 30 seconds to four minutes depending on your conditioning level. (See below chart for more clarification.)
Sets/Reps: Start with 2 trips through one series, and work up to as many as four or five trips.
Series:
- Sprint
- High Knees
- Sprint
- Defensive Shuffles
- Sprint
- Backpedal
- Sprint
L-Agility Drill
Movement Pattern:
- Start on right side of the key at the baseline
- Sprint to and touch cone A
- Backpedal to the baseline
- Sprint back to cone A
- Drop into athletic position and defensive-slide to cone B
- Touch cone B with your left hand, reverse the motion and backpedal to start
Note: perform the entire drill at full speed.
Figure 8 Conditioning Drill
Set-up: Place 5 cones as follows:
- At the free throw line
- Between the free throw line and half court
- Half court
- Between half court and the opposite free throw line
- Opposite free throw line
Movement Pattern:
- Sprint from the right side of cone 1 to the left side of cone 5
- Circle around cone 5, staying low
- Sprint back to and around cone 1
- Continue sprinting in figure 8 pattern for 30 seconds
Zig-Zag Drill
Movement Pattern:
- Start on right side of the key at the baseline
- Navigate through A-B-C-D with any movement pattern specific to basketball (e.g., defensive slide, sprint, backpedal)
- Sprint from D to the backboard, jump and touch the backboard
Sample Drill
- Defensive-slide facing center court to A
- Sprint to B
- Defensive-slide facing center court to C
- Sprint to D and cut hard
- Sprint to and touch backboard
Super Zig Zag
Movement Pattern:
- Start on right side of the key at the baseline
- Navigate through A-B-C-D-E-F-G. Finish with any movement pattern specific to basketball (e.g. defensive-slide, sprint, backpedal)
Sample Drill:
- Defensive-slide through drill as fast as you can.
Little W Drill
Sets/Reps: Perform from both sides with 4-6 sets of varying movements (e.g. defensive slides, sprints, backpedals, carioca
Sample Movement Pattern:
- Start on the left wing facing the baseline
- Sprint from cone A to cone B, lower your inside hand
- Sprint from cone B to cone C, again putting your inside hand down
- Sprint from cone C to cone D, putting your inside hand down
- Final sprint from D to cone E
Note: You can make this drill more sport-specific by incorporating a basketball.
T-Drill
- Sprint from cone 1 to cone 2
- Drop into athletic position and defensive-slide from cone 2 to cone 3
- Defensive-slide from cone 3 to cone 4
- Defensive slide from cone 4 to cone 2
- Backpedal from cone 2 to cone 2
Super T-Drill
- Sprint from cone 1 to cone 5
- Jog from cone 5 to cone 2
- Sprint from cone 2 to cone 3
- Sprint to cone 4
- Jog back to cone 1
- Sprint to cone 2
- Sprint to cone 5
- Raise hands sprint to cone 3
- Jog cone 4
- Sprint back to cone 1
- Sprint back to cone 4
- Sprint to cone 5
- Raise hands and sprint to cone 3
- Jog to cone 4
- Sprint back to cone 1
- Sprint to cone 3 and perform a Vertical Jump
- Backpedal to cone 2
- Sprint to cone 1
- Sprint to cone 3 and perform a Vertical Jump
- Backpedal to cone 2
- Sprint to cone 4
- Sprint to cone 1
- Sprint cone 5
- Carioca to cone 2
- Sprint to cone 3
- Sprint to cone 5
- Backpedal to cone 1
- Sprint to cone 5
- Carioca to cone 4
- Sprint to cone 3
- Sprint to cone 5
- Backpedal to cone 1