2 Piriformis Exercises to Alleviate Glute and Leg Pain
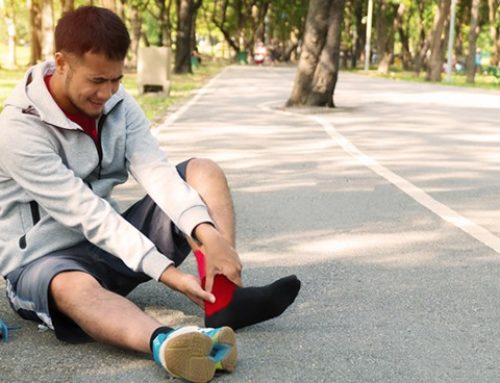
Have you ever felt a nagging pain near the top or middle of your glute that either feels extremely tight or painful? Have you ever felt a burning, numbness or tingling sensation down your leg from butt to calf? Have you had either of these painful occurrences while performing Defense Slides or Clam Shells?
These are extremely common symptoms of piriformis syndrome and complaints I hear from athletes I work with including powerlifters, bodybuilders or even recreational gym goers.
What is the piriformis syndrome?

The piriformis muscle is a deep external rotator of the hip joint. It is considered a deep external rotator because it lies deep beneath the gluteus maximus and below the gluteus medius and minimus. Secondly, and just as important, the sciatic nerve runs directly beneath the piriformis muscle. Additionally, in some individuals (10-12%), the sciatic nerve runs directly through the piriformis muscle, which we saw quite commonly in the anatomy lab I assisted in.
The cause of piriformis pain commonly stems from chronic overuse. When this overuse occurs over long periods of time, the muscle actually becomes larger or inflamed, which causes a decrease in the space surrounding the sciatic nerve.
This results in a spasm of the piriformis muscle or sciatic pain from the compression. If the sciatic nerve is not compromised, pain will mainly be present in the glutes. If the nerve is compressed, you will feel pain along your thigh and potentially down to your foot.
So the question is, how can we either prevent this from occurring, or if symptoms are already occurring, how can they be resolved?
The piriformis release is a great place to begin. Although it can be aggressive, it can potentially help relieve that tension in the piriformis muscle and compression on the sciatic nerve.
Piriformis Partner Release
This rotation of the leg takes the piriformis through its full lengthening and shortening cycle, allowing for the tension inside the piriformis tissue to release, alleviating any spasming or compression of the sciatic nerve.
How to: Lie with your stomach on the floor. Have a partner press into your piriformis with their elbow until they find the tender spot. Once located, they will apply a generous amount of pressure and rotate the ankle of the same leg internally and externally.
Sets/Reps: 2-3×15 each side
Lacrosse Ball Piriformis Release
You only need a lacrosse ball or tennis ball for this one. All of the same concepts are applied from the first release method.
How to: Place a lacrosse ball on the ground, sit down and place your right glute on the ball. Slowly roll around until you find a tender spot to target your piriformis. From this position, slowly internally and externally rotate your leg.
Sets/Reps: 2-3×15 each side
It is important to remember, the majority of the time there are not “quick fixes” for musculoskeletal issues, but if consistent care is taken over days, weeks and months, alleviation of symptoms can be achieved.
In addition to these two release techniques, rehabilitation and corrective exercise can assist in improving muscle imbalances and strengthening the target tissue. These are more likely to have success in the long term, but they also require more work.
The goal of this program is to help you reduce your risk of injury. But if you have already been injured, it can help alleviate your pain and return you to your pre-injury levels. I hope you enjoy and always remember to #HealByMoving.
Flexibility/Mobility

Perform each exercise for 30 seconds on each leg.
a. Side-lying Crossover Stretch
b. Kneeling Piriformis Stretch
c. Supine Figure-Four Piriformis Stretch
d. Standing IT Band Stretch
e. Pigeon Stretch
f. Standing Butterfly
g. Alternating Adductor Stretch
Strengthening/Stability

– Used as a prehab/warm-up circuit: 1 round each exercise (both legs) for 10 repetitions.
– Used as a rehabilitation program: 2 rounds each exercise (both legs) for 15 repetitions.
a. Clam Shells
b. Lateral Side Steps
c. Seated Hip Abduction (3 sec isometric hold)
d. Seated Hip Adduction (3 sec isometric hold)
e. Standing Banded Hip Adduction
f. Donkey Kicks
g. Fire hydrants
h. Standing Banded Hip Extension
i. Standing Banded Hip Abduction
j. Hip Bridges with band
READ MORE:
- How to Treat Piriformis Syndrome
- 6 Stretches to Alleviate Lower-Back Pain
- Advanced Foam Rolling: 2 Techniques for Better Mobility
Image Credit: Eraxion/iStock
[cf]skyword_tracking_tag[/cf]
RECOMMENDED FOR YOU


MOST POPULAR


2 Piriformis Exercises to Alleviate Glute and Leg Pain
Have you ever felt a nagging pain near the top or middle of your glute that either feels extremely tight or painful? Have you ever felt a burning, numbness or tingling sensation down your leg from butt to calf? Have you had either of these painful occurrences while performing Defense Slides or Clam Shells?
These are extremely common symptoms of piriformis syndrome and complaints I hear from athletes I work with including powerlifters, bodybuilders or even recreational gym goers.
What is the piriformis syndrome?
The piriformis muscle is a deep external rotator of the hip joint. It is considered a deep external rotator because it lies deep beneath the gluteus maximus and below the gluteus medius and minimus. Secondly, and just as important, the sciatic nerve runs directly beneath the piriformis muscle. Additionally, in some individuals (10-12%), the sciatic nerve runs directly through the piriformis muscle, which we saw quite commonly in the anatomy lab I assisted in.
The cause of piriformis pain commonly stems from chronic overuse. When this overuse occurs over long periods of time, the muscle actually becomes larger or inflamed, which causes a decrease in the space surrounding the sciatic nerve.
This results in a spasm of the piriformis muscle or sciatic pain from the compression. If the sciatic nerve is not compromised, pain will mainly be present in the glutes. If the nerve is compressed, you will feel pain along your thigh and potentially down to your foot.
So the question is, how can we either prevent this from occurring, or if symptoms are already occurring, how can they be resolved?
The piriformis release is a great place to begin. Although it can be aggressive, it can potentially help relieve that tension in the piriformis muscle and compression on the sciatic nerve.
Piriformis Partner Release
This rotation of the leg takes the piriformis through its full lengthening and shortening cycle, allowing for the tension inside the piriformis tissue to release, alleviating any spasming or compression of the sciatic nerve.
How to: Lie with your stomach on the floor. Have a partner press into your piriformis with their elbow until they find the tender spot. Once located, they will apply a generous amount of pressure and rotate the ankle of the same leg internally and externally.
Sets/Reps: 2-3×15 each side
Lacrosse Ball Piriformis Release
You only need a lacrosse ball or tennis ball for this one. All of the same concepts are applied from the first release method.
How to: Place a lacrosse ball on the ground, sit down and place your right glute on the ball. Slowly roll around until you find a tender spot to target your piriformis. From this position, slowly internally and externally rotate your leg.
Sets/Reps: 2-3×15 each side
It is important to remember, the majority of the time there are not “quick fixes” for musculoskeletal issues, but if consistent care is taken over days, weeks and months, alleviation of symptoms can be achieved.
In addition to these two release techniques, rehabilitation and corrective exercise can assist in improving muscle imbalances and strengthening the target tissue. These are more likely to have success in the long term, but they also require more work.
The goal of this program is to help you reduce your risk of injury. But if you have already been injured, it can help alleviate your pain and return you to your pre-injury levels. I hope you enjoy and always remember to #HealByMoving.
Flexibility/Mobility
Perform each exercise for 30 seconds on each leg.
a. Side-lying Crossover Stretch
b. Kneeling Piriformis Stretch
c. Supine Figure-Four Piriformis Stretch
d. Standing IT Band Stretch
e. Pigeon Stretch
f. Standing Butterfly
g. Alternating Adductor Stretch
Strengthening/Stability
– Used as a prehab/warm-up circuit: 1 round each exercise (both legs) for 10 repetitions.
– Used as a rehabilitation program: 2 rounds each exercise (both legs) for 15 repetitions.
a. Clam Shells
b. Lateral Side Steps
c. Seated Hip Abduction (3 sec isometric hold)
d. Seated Hip Adduction (3 sec isometric hold)
e. Standing Banded Hip Adduction
f. Donkey Kicks
g. Fire hydrants
h. Standing Banded Hip Extension
i. Standing Banded Hip Abduction
j. Hip Bridges with band
READ MORE:
- How to Treat Piriformis Syndrome
- 6 Stretches to Alleviate Lower-Back Pain
- Advanced Foam Rolling: 2 Techniques for Better Mobility
Image Credit: Eraxion/iStock
[cf]skyword_tracking_tag[/cf]